
Introduction
Network boot has existed since the 1980s and I never really found it important enough to ever bother. Perhaps boredom played a role here but looking back I’m glad I gave it a shot. Fiddling with these files made me realize how complicated a boot process really is and how powerful DHCP is in configuring our network. DHCP in my mind was simply a way to configure the IP, DNS and gateway of a device. But there is much more.
DHCP option 119 for example configures a domain search list which allows us to query network resources without having to supply the hostname+domain bit. Instead you simply query \hostname (in windows) or smb://hostname (in linux)
DHCP option 66 defines the TFTP Server name which allows us to boot from the network.
At this point I’m regretting setting fixed IPs on most of my devices. If I had set up MAC address reservation on the firewall instead I would be able to move machines into another network based on the Layer 2 address as opposed to changing it on the firewall/hypervisor and having to login to the machine to reconfigure the fixed IP every time.
How it works
Since network boot is initiated by the DHCP server and that pfsense has a built in option to enable tftp-hpa this should be pretty straightforward. TFTP is a protocol running over udp/69 so we’ll have to allow it on the firewall. Enabling the service automatically created a folder at the root called /tftpboot. Since this plugin does not have webdav support we’ll have to scp or sftp the files into the pfsense. This can be achived by adding your public key to the System>User Management>Authorized SSH keys.
On the pfsense create this folder structure to boot into your UEFI 64 bit images. The iso’s in the tree below are for illustration purposes only as they are not needed to boot.
1
2
3
4
5
6
7
8
9
10
11
12
13
14
15
16
17
18
/tftpboot/
├── EFI/
│   └── BOOT/
│       ├── bootx64.efi         # UEFI bootloader (e.g., GRUB)
│       └── grub.cfg            # GRUB menu configuration
├── iso/
│   ├── debian.iso              # Debian ISO
│   ├── ubuntu.iso              # Ubuntu ISO
│   └── fedora.iso              # Fedora ISO
├── debian/
│   ├── vmlinuz
│   └── initrd.gz
├── ubuntu/
│   ├── vmlinuz
│   └── initrd.gz
├── fedora/
│   ├── vmlinuz
│   └── initrd.img
The initrd.gz and vmlinuz files can be found by mounting the debian.iso (debian-12.10.0-amd64-DVD-1.iso) for example. Don’t use the netinst version of the installer as it does not contain the necessary files. You’ll have to setup a local webserver (http://pxeboot.eu in my example) and try to supply those files over HTTP
1
2
3
4
5
6
7
8
9
10
11
12
13
14
15
16
17
18
19
20
21
22
23
24
25
26
27
root@pfsense:$ chmod -R 755 /tftpboot
root@pfsense:$ chown -R nobody:nogroup /tftpboot
root@pfsense:$ vi /tftpboot/EFI/BOOT/grub.cfg

set timeout=5
set default=0


menuentry "Fedora 42 server" {
    linuxefi /fedora/vmlinuz inst.stage2=http://pxeboot.eu/fedora42-server/ ip=dhcp rd.debug
    initrdefi /fedora/initrd.gz
}

menuentry "Fedora 42 server (online)" {
    linuxefi /fedora/vmlinuz inst.stage2=https://download.fedoraproject.org/pub/fedora/linux/releases/42/Server/x86_64/os/ ip=dhcp nameserver=192.168.178.103 rd.debug
    initrdefi /fedora/initrd.gz
}

menuentry "Debian 12 DVD" {
    linuxefi /debian/vmlinuz
    initrdefi /debian/initrd.gz
}

menuentry "Ubuntu 22.04 desktop" {
    linuxefi /ubuntu/vmlinuz
    initrdefi /ubuntu/initrd.gz
}
In the example above you can of course replace 192.168.178.103 with your local DNS or a popular one like cloudflare’s DNS: 1.1.1.1
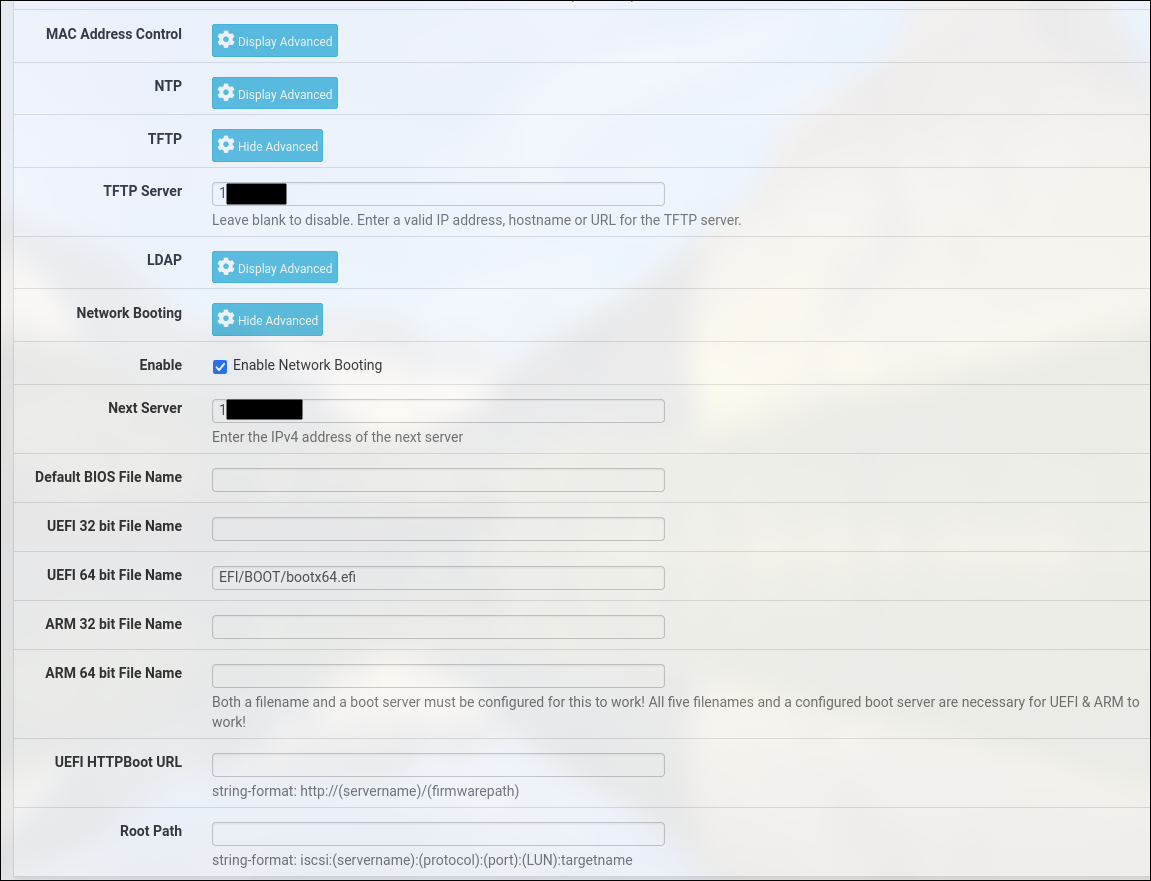
Configuring pfsense
Go to the VLAN or the interface that should have network boot enable it, set a name for “UEFI file name” and set the TFTP address.
ipxe to the rescue: netboot_xyz
The setup above worked wonderfully with debian. However, no matter what I tried I can’t get the fedora or the ubuntu ISO’s to boot even though I stat’d those files, realized they were compressed with xz, decompressed them, made sure the init folder exists and compressed them back into a gzip format.
At some point I gave up because I found this tool that made this whole process a one click solution. The tool is called netboot_xyz and has other advantages like having an updated database so that I’m always on the latest release and the possibility to cache artifacts locally. Pfsense needed to be slightly reconfigured but setting up this tool was as straightforward as it can get. Instead of EFI/BOOT/grub.cfg the file name should be set to: netboot.xyz.efi
To avoid any surprises make sure the ipxe clients have at least 4 Gb of RAM. If you boot arch linux from netboot_xyz it will literally build it on RAM. The debian installer would throw a kernel panic if you don’t have at least 1 GB for the same reason.
Conclusion
On and all network boot is an interesting case and I will definitely start retiring my Ventoy keys. It would also give businesses another reason to disable USB ports.
Anyways, I’ll be putting this knowledge to work and add it to the next pen tests. These old insecure protocols like NFS and TFTP allow you to get stuff across networks without authentication or authorization.
See you on the next one
Cheers