
Introduction
SSO stands for single sign on. Building on the first part of our SSO journey let’s now configure the identity provider, our domain controller and the active directory in order to have one identity to rule them all.
The obvious advantage of introducing such a system is to centralize access control and simplify the onboarding/offboarding in a work setting. The second is of course the convenience of having one set of credentials for any app you use. A third advantage comes from the fact that by logging in once in the morning automatically provides you access to any application whithout needing to input your credentials once again.
Let’s enumerate some use cases for illustration purposes. A developer wants to SSH into a machine or log into gitlab to have a look at a pull request? Both of these actions can be centralized into an single sign on identity provider. Nowadays most modern web applications provide OAuth by default which allows us to add them to our scope. Another critical task for sys admins is to log into a proxmox management interface or a proxmox backup server for example. Both of these applications offer OAuth. The only exception here would be something like Jira or atlassian who refuse to comply to this standard (sigh).
By the end of this article you should have a pretty good idea of what possibilities exist in this space and how to set it up.
Configuration: our identity provider
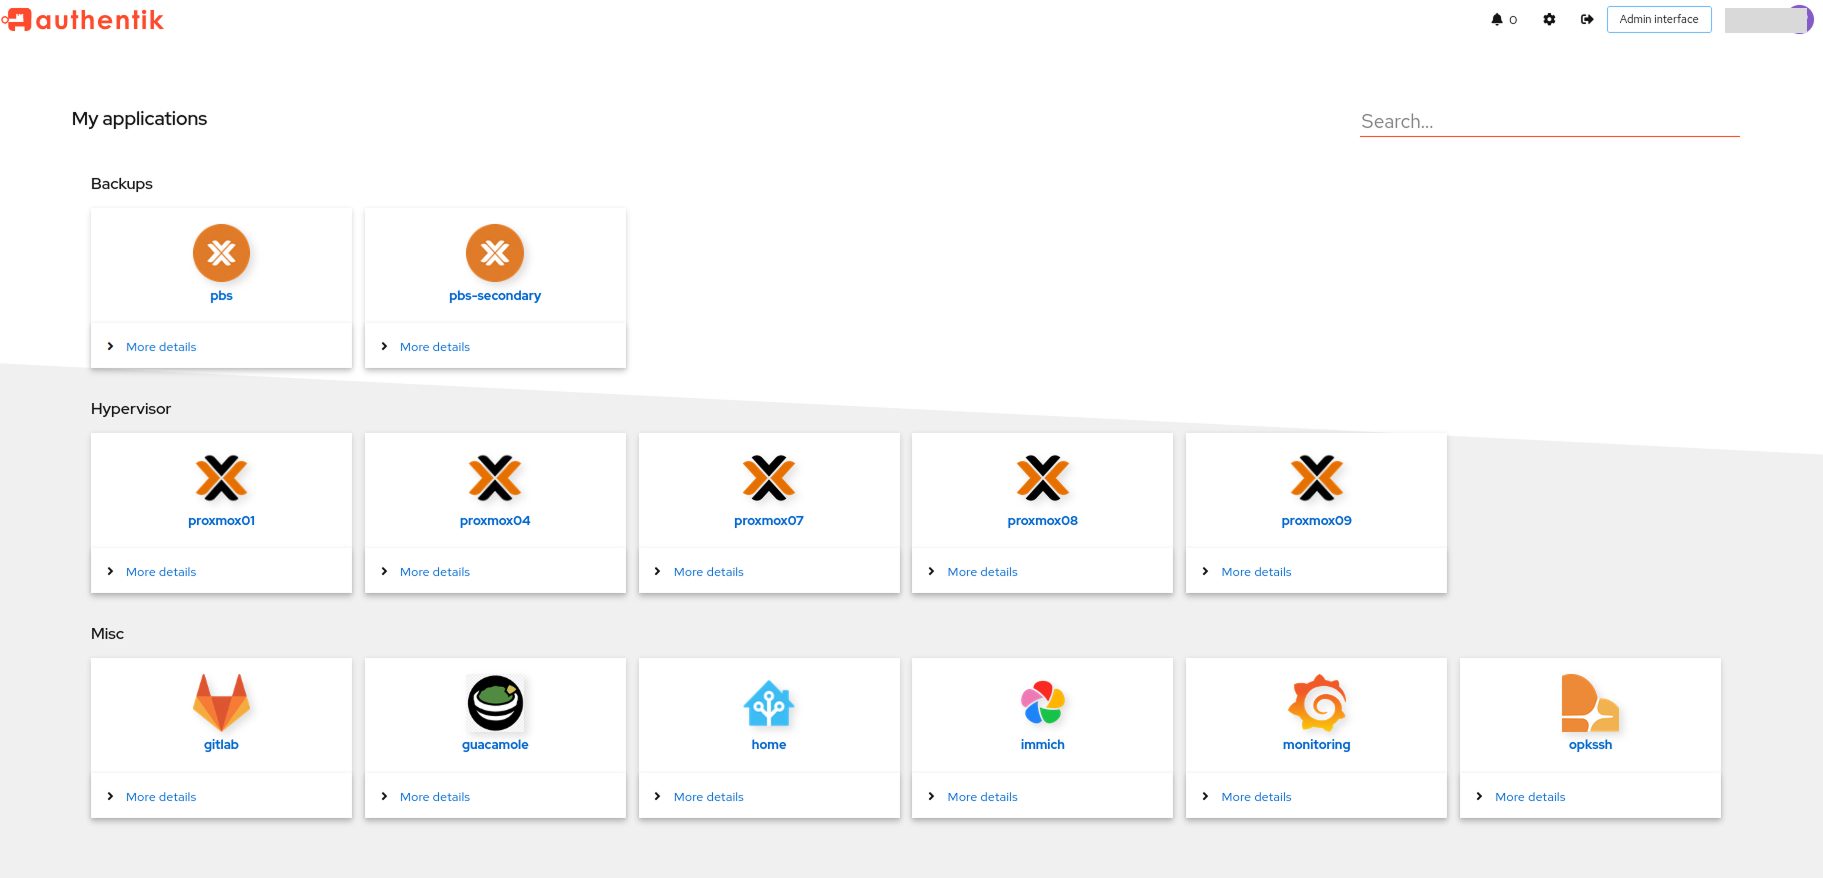
I got to play around with other identity providers but I wanted something that would not cost a fortune, would respect an open standard thereby avoiding vendor lockin and wouldn’t bind me to any powerful tech mega corporation. Authentik seemed to fit the bill so let’s start it up
1
2
3
4
5
6
7
8
9
10
11
12
13
14
15
16
17
18
19
20
21
22
23
24
25
26
27
28
29
30
31
32
33
34
35
36
37
38
39
40
41
42
43
44
45
46
47
48
49
50
51
52
53
54
55
56
57
58
59
60
61
62
63
64
65
66
67
68
69
70
71
72
73
74
75
76
77
78
79
80
81
82
83
84
85
86
87
88
89
90
91
92
93
94
95
96
97
98
99
100
101
102
103
104
105
106
107
108
root@authentik:$ touch .env
root@authentik:$ nano docker-compose.yml

services:
  postgres:
    image: docker.io/library/postgres:16.6
    container_name: authentik-database
    environment:
      - POSTGRES_USER=${POSTGRES_USER:-authentik}
      - POSTGRES_PASSWORD=${POSTGRES_PASSWORD:?error}
      - POSTGRES_DB=${POSTGRES_DB:-authentik}
      - TZ=${TZ:-UTC}
    healthcheck:
      test: ['CMD-SHELL', 'pg_isready -U "${POSTGRES_USER:-authentik}"']
      start_period: 30s
      interval: 10s
      timeout: 10s
      retries: 5
    volumes:
      - ./postgres_data:/var/lib/postgresql/data
    restart: unless-stopped
  redis:
    image: docker.io/library/redis:7.4.1
    container_name: authentik-rdis
    command: --save 60 1 --loglevel warning
    healthcheck:
      test: ["CMD-SHELL", "redis-cli ping | grep PONG"]
      start_period: 20s
      interval: 30s
      retries: 5
      timeout: 3s
    volumes:
      - ./redis_data:/data
    restart: unless-stopped
  server:
    image: ghcr.io/goauthentik/server:2024.12.3
    container_name: authentik-srv
    command: server
    environment:
      - AUTHENTIK_REDIS__HOST=authentik-rdis
      - AUTHENTIK_POSTGRESQL__HOST=authentik-database
      - AUTHENTIK_POSTGRESQL__USER=${POSTGRES_USER:-authentik}
      - AUTHENTIK_POSTGRESQL__NAME=${POSTGRES_DB:-authentik}
      - AUTHENTIK_POSTGRESQL__PASSWORD=${POSTGRES_PASSWORD:?error}
      # (Required)  To generate a secret key run the following command:
      #             echo $(openssl rand -base64 32)
      - AUTHENTIK_SECRET_KEY=${AUTHENTIK_SECRET_KEY:?error}
      # (Optional)  Enable Error Reporting
      # - AUTHENTIK_ERROR_REPORTING__ENABLED=${AUTHENTIK_ERROR_REPORTING:-false}
      # (Optional)  Enable Email Sending
      - AUTHENTIK_EMAIL__HOST=${EMAIL_HOST:?error}
      - AUTHENTIK_EMAIL__PORT=${EMAIL_PORT:-25}
      - AUTHENTIK_EMAIL__USERNAME=${EMAIL_USERNAME:?error}
      - AUTHENTIK_EMAIL__PASSWORD=${EMAIL_PASSWORD:?error}
      - AUTHENTIK_EMAIL__USE_TLS=${EMAIL_USE_TLS:-false}
      - AUTHENTIK_EMAIL__USE_SSL=${EMAIL_USE_SSL:-false}
      - AUTHENTIK_EMAIL__TIMEOUT=${EMAIL_TIMEOUT:-10}
      - AUTHENTIK_EMAIL__FROM=${EMAIL_FROM:?error}
      - AUTHENTIK_LDAP__TASK_TIMEOUT_HOURS=24
    ports:
      - 9001:9000
      - 9444:9443
    volumes:
      - ./media:/media
      - ./custom-templates:/templates
    depends_on:
      - postgres
      - redis
    restart: unless-stopped
  worker:
    image: ghcr.io/goauthentik/server:2024.12.3
    container_name: authentik-wrker
    command: worker
    environment:
      - AUTHENTIK_REDIS__HOST=authentik-rdis
      - AUTHENTIK_POSTGRESQL__HOST=authentik-database
      - AUTHENTIK_POSTGRESQL__USER=${POSTGRES_USER:-authentik}
      - AUTHENTIK_POSTGRESQL__NAME=${POSTGRES_DB:-authentik}
      - AUTHENTIK_POSTGRESQL__PASSWORD=${POSTGRES_PASSWORD:?error}
      # (Required)  To generate a secret key run the following command:
      #             echo $(openssl rand -base64 32)
      - AUTHENTIK_SECRET_KEY=${AUTHENTIK_SECRET_KEY:?error}
      # (Optional)  Enable Error Reporting
      # - AUTHENTIK_ERROR_REPORTING__ENABLED=${AUTHENTIK_ERROR_REPORTING:-false}
      # (Optional)  Enable Email Sending
      - AUTHENTIK_EMAIL__HOST=${EMAIL_HOST:?error}
      - AUTHENTIK_EMAIL__PORT=${EMAIL_PORT:-25}
      - AUTHENTIK_EMAIL__USERNAME=${EMAIL_USERNAME:?error}
      - AUTHENTIK_EMAIL__PASSWORD=${EMAIL_PASSWORD:?error}
      - AUTHENTIK_EMAIL__USE_TLS=${EMAIL_USE_TLS:-false}
      - AUTHENTIK_EMAIL__USE_SSL=${EMAIL_USE_SSL:-false}
      - AUTHENTIK_EMAIL__TIMEOUT=${EMAIL_TIMEOUT:-10}
      - AUTHENTIK_EMAIL__FROM=${EMAIL_FROM:?error}
      - AUTHENTIK_LDAP__TASK_TIMEOUT_HOURS=24
    # (Optional)  When using the docker socket integration
    #             See more for the docker socket integration here:
    #             https://goauthentik.io/docs/outposts/integrations/docker
    # user: root
    volumes:
      # (Optional)  When using the docker socket integration
      # - /run/docker.sock:/run/docker.sock
      - ./media:/media
      - ./certs:/certs
      - ./custom-templates:/templates
    depends_on:
      - postgres
      - redis
    restart: unless-stopped
How to setup the windows server as a domain controller
You should make sure to have a fixed IP, a good sounding hostname and make sure to promote the server into a domain controller before installing the Certificate authority otherwise you’ll be stuck and have to start all over again.
Make sure to run Sysprep in case you decide to reuse an existing VM. Windows won’t allow 2 machines with the same security ID to enter the same domain. Since you cloned the machine that security gets cloned as well unfortunately.
- set up a machine with virtio disk windows server and attach virtio-win drivers (the red hat drivers) as an external media drive
- set up a windows 2022 (not the datacenter version) with a desktop environment
- load the virtio driver for virtio-scsi passthrough
- Wait for the machine to boot
- install the virtio drivers and the guest agent that come with the cd
- change the machine name system>erweiterte systemeinstellungen
- allow rdp (allow remote desktop)
- set static ip address
- add following roles: dns server and active directory domain services
- next, next, next
- restart
- Promote the server into a Domain Controller
- if you want add roles for the ldaps: Web Server Role (IIS) with AD CS zertifikatdienste > Certificate authority and certification authority web enrollment (zertifizierungsstelle and optionally zertifizierungsstellen-webregistrierung)
- don’t create a dns delegation in the feature options
- set your core dns’ or pihole as an upstream DNS
- configure the CA
- reboot
- create a group inside of the users’ OU
- create a test user and assign it to the group
- allow the group to RDP
Configure LDAPs on the domain controller
Our next step will be to generate some TLS certificates for our LDAP connection otherwise Authentik won’t be able to change AD passwords. Let’s start by adding the role
Follow the instructions from vcloud-lab. He does a great job at explaining this process step by step
Once you’re done, run the script to export the cert:
1
2
3
4
5
6
7
New-Item -Path C:\ -Name Certs -ItemType Directory

Get-ChildItem Cert:\LocalMachine\My\ | Select-Object ThumbPrint, Subject, NotAfter, EnhancedKeyUsageList

$password = ConvertTo-SecureString -String "<password>" -Force -AsPlainText

Get-ChildItem -Path Cert:\LocalMachine\My\2BEB97A137C5B9F65CFADF67059FAB0C640EEFB2 | Export-PfxCertificate -FilePath C:\Certs\LDAPs.pfx -Password $password
Now you’ll just have to copy it into the AD’s cert store and you’re done
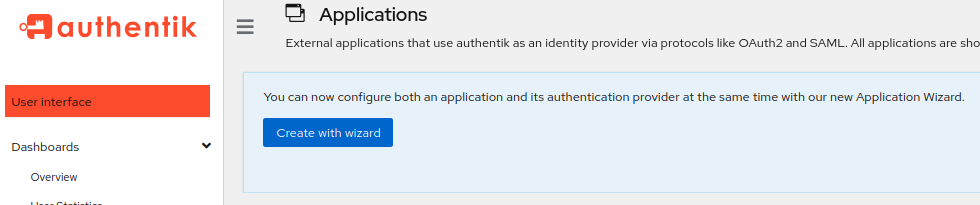
Setting up your applications
There is a wizard on the application section. Simply click on it and go through the process. You can set up permissions in this process at the end as well which I find pretty neat compared to the previous authentik experience.
Link Active directory users
Let’s now configure a sync job that will poll the AD for any changes every 2 hours by default.
- Go into Directory>Federation and Social Login, create an LDAP source instance and call it something like “Active directory”
- Create a service account that has domain user level permissions or at least enough to read user details and change passwords
- Input the service account’s CN into our LDAP source e.g.akadmin@domain.example.com
- Give a Base DN e.g. DC=example,DC=com
- Restrict the User import by specifying the “Addition User DN” e.g. OU=Mitarbeiter
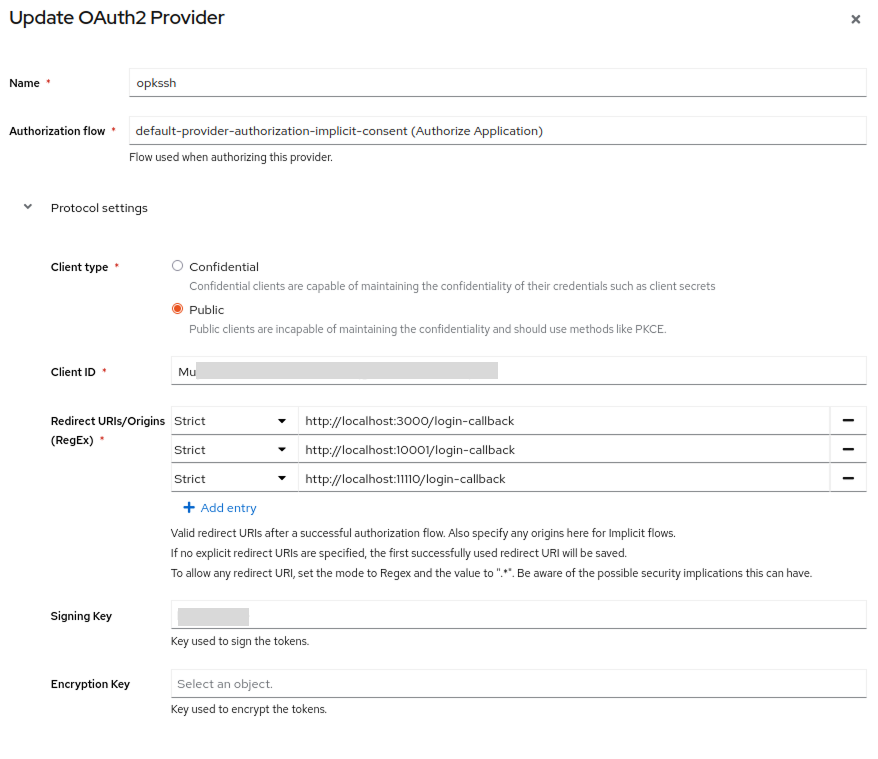
SSH over Authentik
We’ll be using cloudflare’s tool for this purpose which is wonderfully documented for our purposes.
Start by setting up an app with the wizard just like we did earlier and make sure it looks like this:
On the (linux 64bit x86 cpu architecture) client:
1
2
3
4

root@authentik:$ curl -L https://github.com/openpubkey/opkssh/releases/latest/download/opkssh-linux-amd64 -o opkssh; chmod +x opkssh

root@authentik:$ opkssh login --provider=https://authentik.local/application/o/opkssh/,ClientID123
A windows should appear redirecting you to your authentik instance. Login and allow the token access to your email and group membership.

On the (debian) server:
1
2
3
4
5
6
7
8
9
10
11
12

root@authentik:$ wget -qO- "https://raw.githubusercontent.com/openpubkey/opkssh/main/scripts/install-linux.sh" | bash

root@authentik:$ opkssh add root alice@gmail.com https://authentik.local/application/o/opkssh/

root@authentik:$ systemctl restart ssh

root@authentik:$ nano /etc/opk/providers
(...)
https://authentik.local/application/o/opkssh/ ClientID123 24h
Try to ssh from the client with either of these methods:
1
2
3
4
5
6
7
8
9
10
11
12
13

root@authentik:$ ssh root@<servers ip> -i ~/.ssh/id_ecdsa
root@authentik:$ nano /root/.ssh/config

Host myserver
  HostName servers ip
  User root
  Port 22
  IdentityFile ~/.ssh/id_ecdsa
  IdentitiesOnly yes

root@authentik:$ ssh myserver
I’ve set the token’s validity to 24 hours so it logged me in right away without redirecting to authentik first. If that validity is expired opkssh would ask you to login into authentik and you would get a new public key to log into your server once again.
That’s it ! I’ll add an article to this series in case something new pops up. Thanks for reading