
Introduction
This is the third one in the series. We looked at how to install, configure kubernetes and deploy a web app with it. Now we’ll take setup to another level with 3 control planes and 3 workers on a 3 node cluster.
Install the OS
Regular rocky linux 10 with ext4 partition
If you’re in a rush you can install the OS through hetzner’s tool. Documentation on hetzner’s tool can be found here.
To run a fresh install run the command below, choose the distro and press F10 to apply
1
root@rescue:$ installimage -l config
You can also give it a configuration file and you don’t need to type anything else manually
1
2
3
4
5
6
7
8
9
10
11
12
13
14
15
16
17
18
19
20
21

root@rescue:$ cat <<EOF > install-config.txt
DRIVE1 /dev/nvme0n1

DRIVE2 /dev/nvme1n1

SWRAID 1

SWRAIDLEVEL 1 # Use 1 for Raid 1

HOSTNAME k8s-node01.example.com # Set correct hostname

IPV4_ONLY no

USE_KERNEL_MODE_SETTING yes

PART /boot ext3 512M
PART / ext4 32G

IMAGE /root/.oldroot/nfs/install/../images/Rocky-1000-amd64-base.tar.gz
EOF
1
root@rescue:$ installimage -a -c install-config.txt
If everything went well you should see a summary and simply type reboot
Fedora server 42 with btrfs on root
Btrfs has the advantage of being a lot faster than rsync so if you have a lot of data and you’re planning on doing remote backups over a flacky VPN connection this is the setup you want instead of the ext4 filesystem.
I’ll create an ext4 partition for the grub boot files and a btrfs raid 1 with the available space that is left so that we can btrfs send snapshots to a remote backup location. I wrote an article on using the btrfs send command already. Check it out here if you’re interested
Prepare the rootfs from a fedora 42 workstation you might have laying around.
1
2
3
4
5
6
7
8
9
10
mkdir -p /home/hugo/fedora-rootfs

sudo dnf --releasever=42 --installroot=/home/hugo/fedora-rootfs \
    --setopt=install_weak_deps=False \
    --use-host-config \
    install -y bash passwd dnf fedora-release systemd sudo cloud-init

sudo rm -rf ~/fedora-rootfs/var/cache/dnf
cd ~/fedora-rootfs
sudo tar -cJf ~/fedora-rootfs.tar.xz .
Upload the rootfs to an s3 bucket and boot the hetzner machine into rescue mode
1
2
3
4
5
6
7
8
9
10
11
12
13
14
15
16
17
18
19
20
21
22
DISK=/dev/nvme0n1
# Get total disk size in GiB (first nonzero line)
DISK_SIZE_BYTES=$(lsblk -bno SIZE "$DISK" | awk '$1 > 0 {print $1; exit}')
DISK_SIZE_GB=$((DISK_SIZE_BYTES / 1024 / 1024 / 1024))
# Calculate start point for the 50 GB partition
START_GB=$((DISK_SIZE_GB - 50))

parted "$DISK" --script mklabel gpt
parted "$DISK" --script mkpart primary 1MiB 2MiB
parted "$DISK" --script set 1 bios_grub on
parted "$DISK" --script mkpart primary 2MiB 522MiB
parted "$DISK" --script mkpart primary 522MiB ${START_GB}GiB
parted "$DISK" --script mkpart primary ${START_GB}GiB 100%

DISK=/dev/nvme1n1

parted "$DISK" --script mklabel gpt
parted "$DISK" --script mkpart primary 1MiB 2MiB
parted "$DISK" --script set 1 bios_grub on
parted "$DISK" --script mkpart primary 2MiB 522MiB
parted "$DISK" --script mkpart primary 522MiB ${START_GB}GiB
parted "$DISK" --script mkpart primary ${START_GB}GiB 100%
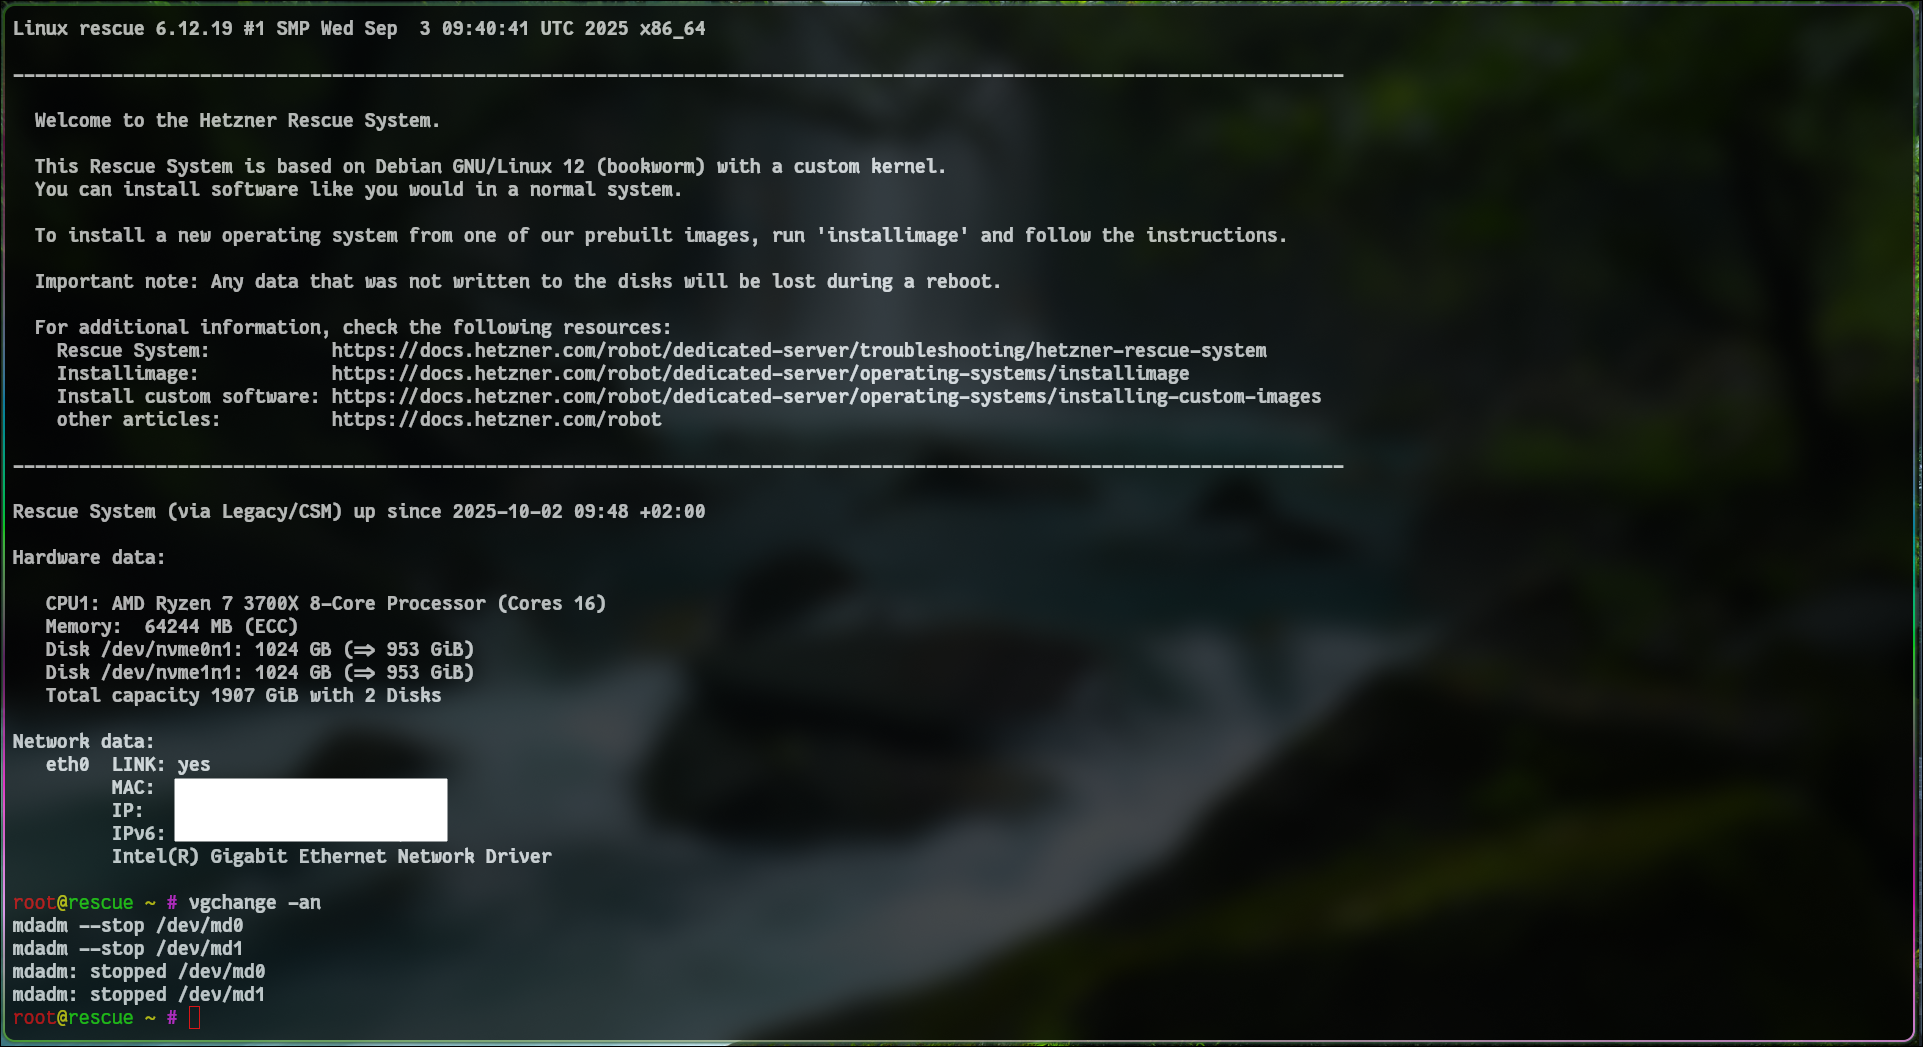
If the command above failed it probably means that you’re running some kind of raid already in the background
1
2
3
4
5
# deactivate LVM volume groups
vgchange -an
mdadm --stop /dev/md0
mdadm --stop /dev/md1
mdadm --stop /dev/md....
If you didn’t get an error proceed with the installation:
1
2
3
4
5
6
7
8
9
10
11
12
13
14
15
16
17
18
19
20
21
22
23
24
25
26
27
28
29
30
31
32
33
34
35
36
37
38
39
40
41
42
43
44
45
46
47
48
49
50
51
52
53
54
55
56
57
58
59
60
61
62
63
64
65
66
67
68
69
70
71
72
73
74
75
76
77
78
79
80
81
82
83
84
85
86
87
88
89
90
91
92
93
94
95
96
# y flag ensures the command runs in a script, non interactively
mdadm --create --verbose /dev/md0 --level=1 --raid-devices=2 /dev/nvme0n1p2 /dev/nvme1n1p2 -y
# F flag ensures the command runs in a script, non interactively and forcing the signature overwrite
mkfs.ext4 -F /dev/md0

# Format and setup raid
mkfs.btrfs -f -d raid1 -m raid1 /dev/nvme0n1p4 /dev/nvme1n1p4
mount /dev/nvme0n1p4 /mnt

btrfs filesystem df /mnt
Data, RAID1: total=1.00GiB, used=0.00B
System, RAID1: total=8.00MiB, used=16.00KiB
Metadata, RAID1: total=1.00GiB, used=128.00KiB
GlobalReserve, single: total=5.50MiB, used=0.00B

btrfs subvolume create /mnt/root
umount /mnt
mount -o subvol=root /dev/nvme0n1p4 /mnt/
btrfs filesystem df /mnt

# apply the rootfs
wget https://minio-api.thekor.eu/public-f1492f08-f236-4a55-afb7-70ded209cb27/fedora-rootfs.tar.xz
tar -xJf fedora-rootfs.tar.xz -C /mnt

# set up the fstab
BOOT_UUID=$(blkid -s UUID -o value /dev/md0)
ROOT_UUID=$(blkid -s UUID -o value /dev/nvme0n1p4)

cat <<EOF > /mnt/etc/fstab
UUID=$ROOT_UUID / btrfs subvol=root,compress=zstd:1,x-systemd.device-timeout=0 0 0
UUID=$BOOT_UUID /boot ext4 defaults 0 0
EOF

# download the pub key
mkdir -p /mnt/root/.ssh
chmod 700 /mnt/root/.ssh
curl -fsSL https://minio-api.thekor.eu/public-f1492f08-f236-4a55-afb7-70ded209cb27/id_ed25519.pub > /mnt/root/.ssh/authorized_keys
chmod 600 /mnt/root/.ssh/authorized_keys

# ssh config
cat <<EOF > /mnt/etc/ssh/sshd_config
Include /etc/ssh/sshd_config.d/*.conf
AuthorizedKeysFile	.ssh/authorized_keys
PermitRootLogin prohibit-password
Subsystem       sftp    /usr/libexec/openssh/sftp-server
EOF

# temporary DNS to be able to set up the image properly
cat > /mnt/etc/resolv.conf << 'EOF'
nameserver 1.1.1.1
nameserver 8.8.8.8
nameserver 8.8.4.4
options rotate
options timeout:2
EOF

# Enable open ssh server
# mount -o subvol=root /dev/nvme0n1p3 /mnt/
mount --bind /dev /mnt/dev
mount --bind /proc /mnt/proc
mount --bind /sys /mnt/sys
mount --bind /dev/pts /mnt/dev/pts
mount /dev/md0 /mnt/boot
chroot /mnt /bin/bash -c "dnf install -y openssh-server && systemctl enable sshd && dnf install -y grub2 grub2-tools"

# Install GRUB BIOS
chroot /mnt /bin/bash -c "dnf install -y mdadm btrfs-progs && mdadm --detail --scan"
chroot /mnt /bin/bash -c "grub2-install --target=i386-pc /dev/nvme0n1"
chroot /mnt /bin/bash -c "grub2-install --target=i386-pc /dev/nvme1n1"
chroot /mnt /bin/bash -c "grub2-mkconfig -o /boot/grub2/grub.cfg"

# generate the /boot/initramfs
chroot /mnt /bin/bash -c "dnf install -y kernel kernel-core kernel-modules && dracut --regenerate-all --force"
# set a password otherwise you won't be able to login as the root is locked without a password
chroot /mnt /bin/bash -c "passwd root"

# Install and configure networking in chroot
chroot /mnt /bin/bash <<'EOF'
set -e

# Install NetworkManager
dnf install -y NetworkManager nano

# Enable it at boot
systemctl enable NetworkManager

# Add a DHCP connection for ens18 (IPv4 only)
nmcli con add type ethernet ifname ens18 con-name ens18 ipv4.method auto ipv6.method ignore

# Bring it up immediately
nmcli con up ens18
EOF

# Clean up
umount -R /mnt
reboot
If you shutdown your machine instead, make sure not to trigger the hardware reset while off because you’ll lose access to the machine and have to wait for a technician to manually start it
Configure the nodes
setup fail2ban since you’re opening ssh to the world wide web
1
2
3
4
5
6
7
8
9
10
11
root@node0X:$ hostnamectl set-hostname kube-nodeX
root@node0X:$ dnf install systemd-resolved ssh -y
root@node0X:$ systemctl enable --now systemd-resolved
# make sure the symlink is created otherwise create it manually
root@node0X:$ ln -sf /run/NetworkManager/resolv.conf /run/systemd/resolve/resolv.conf
root@node0X:$ cat <<EOF >> /etc/hosts
10.210.19.11 kube-node1
10.210.19.12 kube-node2
10.210.19.13 kube-node3
116.203.62.99 git.adata.de
EOF
Setup jails for ssh
1
2
3
4
5
6
7
8
9
10
11
12
root@node0X:$ dnf upgrade -y && dnf install fail2ban -y
root@node0X:$ dnf install epel-release -y

# required for the ansible script to run
root@node0X:$ dnf install -y python3-libdnf5
root@node0X:$ systemctl status fail2ban.service
root@node0X:$ cp /etc/fail2ban/jail.conf /etc/fail2ban/jail.local
root@node0X:$ nano /etc/fail2ban/jail.local
[sshd]
(...)
enabled = true
maxretry = 5
Start and enable the service
1
2
root@node0X:$ systemctl enable --now fail2ban
root@node0X:$ fail2ban-client status sshd
Set up the network overlay so that the nodes can reach each other
1
2
3
4
5
6
7
8
9
10
11
root@node01:$ nmcli connection add type vlan con-name vlan4000 dev enp9s0 id 4000
root@node01:$ nmcli connection modify vlan4000 802-3-ethernet.mtu 1400
root@node01:$ nmcli connection modify vlan4000 ipv4.method manual ipv4.addresses "10.210.19.11/20"
root@node01:$ nmcli connection up vlan4000
root@node01:$ ip link set enp9s0.4000 name vlan4000
# set the vlan id
root@node01:$ nano /etc/NetworkManager/system-connections/vlan4000.nmconnection
[connection]
id=vlan4000
(...)
interface-name=vlan4000
On node 2:
1
2
3
4
5
6
7
8
9
10
11
root@node02:$ nmcli connection add type vlan con-name vlan4000 dev enp41s0 id 4000
root@node02:$ nmcli connection modify vlan4000 802-3-ethernet.mtu 1400
root@node02:$ nmcli connection modify vlan4000 ipv4.method manual ipv4.addresses "10.210.19.12/20"
root@node02:$ nmcli connection up vlan4000
root@node02:$ ip link set enp41s0.4000 name vlan4000
# set the vlan id
root@node02:$ nano /etc/NetworkManager/system-connections/vlan4000.nmconnection
[connection]
id=vlan4000
(...)
interface-name=vlan4000
On node 3:
1
2
3
4
5
6
7
8
9
10
11
root@node03:$ nmcli connection add type vlan con-name vlan4000 dev enp35s0 id 4000
root@node03:$ nmcli connection modify vlan4000 802-3-ethernet.mtu 1400
root@node03:$ nmcli connection modify vlan4000 ipv4.method manual ipv4.addresses "10.210.19.13/20"
root@node03:$ nmcli connection up vlan4000
root@node03:$ ip link set enp35s0.4000 name vlan4000
# set the vlan id
root@node03:$ nano /etc/NetworkManager/system-connections/vlan4000.nmconnection
[connection]
id=vlan4000
(...)
interface-name=vlan4000
On node 1:
1
2
3
4
5
6
7
8
9
10
11
12
13
14
15
16
17
18
19
20
21
22
23
24
25
26
27
28
29
root@node01:$ dnf install python3 python3-pip git vi vim -y
root@node01:$ git clone https://github.com/kubernetes-sigs/kubespray.git
root@node01:$ git checkout tags/v2.28.1
root@node01:$ cd kubespray/
root@node01:$ python3 -m venv env
root@node01:$ source env/bin/activate
root@node01:$ pip install -r requirements.txt
root@node01:$ python -c "import sys; print(sys.version)" > release.txt
root@node01:$ cp -rfp inventory/sample inventory/mycluster
# remove the inventory from the gitignore so that we can keep track of what changed
root@node01:$ nano .gitignore
root@node01:$ echo "" > inventory/mycluster/inventory.ini
root@node01:$ nano inventory/mycluster/inventory.ini
[kube_control_plane]
kube-node1 ansible_host=10.210.19.11 ip=10.210.19.11 etcd_member_name=etcd1
kube-node2 ansible_host=10.210.19.12 ip=10.210.19.12 etcd_member_name=etcd2
kube-node3 ansible_host=10.210.19.13 ip=10.210.19.13 etcd_member_name=etcd3

[etcd:children]
kube_control_plane

[kube_node]
kube-node1 ansible_host=10.210.19.11 k8s_node_vlan_iface=vlan4000
kube-node2 ansible_host=10.210.19.12 k8s_node_vlan_iface=vlan4000
kube-node3 ansible_host=10.210.19.13 k8s_node_vlan_iface=vlan4000

[k8s_cluster:children]
kube_control_plane
kube_node
Configure the cluster:
1
2
3
4
5
6
7
8
9
10
11
12
13
14
15
16
17
18
(...)
root@node01:$ nano inventory/mycluster/group_vars/k8s_cluster/k8s-cluster.yml
# Use Flannel as CNI
kube_network_plugin: flannel

# Flannel backend type
flannel_backend_type: vxlan

# MTU for Flannel to match Hetzner VLAN
flannel_mtu: 1400

helm_enabled: true
kube_proxy_mode: iptables

# SVC network 10.233.0.1 -> 10.233.63.254
kube_service_addresses: 10.233.0.0/18
# Pod network and service CIDRs 10.233.64.1 -<> 10.233.127.254
kube_pods_subnet: 10.233.64.0/18
Configure the flannel CNI:
1
2
3
root@node01:$ nano inventory/mycluster/group_vars/k8s_cluster/k8s-net-flannel.yml
(...)
flannel_interface: "{{ k8s_node_vlan_iface }}"
test out if the variables are being read in properly
1
2
root@node01:$ ansible kube-node1 -i inventory/mycluster/inventory.ini -m debug -a "var=inventory_hostname"
root@node01:$ ansible kube-node1 -i inventory/mycluster/inventory.ini -m debug -a "var=k8s_node_vlan_iface"
change the default nodelocaldns_ip and append the cluster dns here:
1
2
3
4
root@node01:$ nano inventory/mycluster/group_vars/k8s_cluster/k8s-cluster.yml
(...)
nodelocaldns_ip: 10.233.0.10
cluster_dns: 10.233.0.10
Specify the user ansible will use to SSH into the remote hosts.
1
2
3
4
root@node01:$ nano inventory/mycluster/group_vars/all/all.yml
(...)
ansible_ssh_user: root
ansible_ssh_private_key_file: /root/.ssh/id_ed25519
1
root@node01:$ ssh-keygen
and copy over the public and private key to the 3 nodes ~/.ssh/authorized_keys
This should say ok for the 3 nodes
1
root@node01:$ ansible -i inventory/mycluster/inventory.ini all -m ping
A. firewall setup
Create a private zone, assign it to the VLAN interface and allow all traffic within that zone
1
2
3
4
5
6
7
8
9
10
11
root@node01:$ firewall-cmd --permanent --new-zone=myprivate
root@node01:$ firewall-cmd --permanent --zone=public --remove-interface=vlan4000
root@node01:$ firewall-cmd --permanent --zone=myprivate --add-rich-rule='rule family="ipv4" source address="10.0.0.0/8" accept'
root@node01:$ firewall-cmd --permanent --zone=myprivate --change-interface=vlan4000
root@node01:$ firewall-cmd --reload
root@node01:$ systemctl restart firewalld && systemctl status firewalld
root@node01:$ nmcli con modify vlan4000 ipv4.ignore-auto-dns yes
root@node01:$ nmcli con modify vlan4000 ipv4.dns "8.8.8.8 1.1.1.1"
root@node01:$ nmcli connection modify vlan4000 connection.zone myprivate
root@node01:$ nmcli connection down vlan4000
root@node01:$ nmcli connection up vlan4000
If it fails because the interfaces are managed by NetworkManager:
1
2
3
4
5
6
7
8
nmcli connection modify vlan4000 connection.zone ""
nmcli connection down vlan4000
nmcli connection up vlan4000

nmcli connection modify 'cloud-init enp35s0' connection.zone ""
nmcli connection down 'cloud-init enp35s0'
nmcli connection up 'cloud-init enp35s0'
remove ssh and cockpit access from “anywhere”. We also don’t need dhcp service on the servers so we’ll turn it off
1
2
3
root@node0X:$ firewall-cmd --zone=public --permanent --remove-service=cockpit
root@node0X:$ firewall-cmd --zone=public --permanent --remove-service=ssh
root@node0X:$ firewall-cmd --zone=public --permanent --remove-service=dhcpv6-client
1
2
3
4
5
6
7
8
9
10
11
12
13
14
root@node0X:$ firewall-cmd --zone=public --permanent \
  --add-rich-rule='rule family=ipv4 source address=10.0.0.0/8 service name=ssh accept' \
  --add-rich-rule='rule family=ipv4 source address=172.16.0.0/12 service name=ssh accept' \
  --add-rich-rule='rule family=ipv4 source address=192.168.0.0/16 service name=ssh accept' \
  --add-rich-rule='rule family=ipv4 source address=93.92.117.123 service name=ssh accept' \
  --add-rich-rule='rule family=ipv4 source address=185.224.117.254 service name=ssh accept'
root@node0X:$ firewall-cmd --zone=myprivate --add-port=22/tcp --permanent
root@node0X:$ firewall-cmd --zone=myprivate --permanent --add-rich-rule='rule family="ipv4" protocol value="icmp" accept'
root@node0X:$ firewall-cmd --zone=myprivate --add-forward --permanent
root@node0X:$ firewall-cmd --reload
root@node0X:$ firewall-cmd --list-all
# verifu it got applied correctly
root@node0X:$ firewall-cmd --get-zones
root@node0X:$ firewall-cmd --get-active-zones
B. permit VLAN traffic
Allow NATing. You should set the target to DROP otherwise a default ACCEPT policy ignores all your firewall rules and simply allows everything to go through
1
2
3
4
5
6
7
8
9
10
root@node0X:$ firewall-cmd --zone=public --add-port=53/udp --permanent
root@node0X:$ firewall-cmd --permanent --zone=public --set-target=DROP
root@node0X:$ firewall-cmd --permanent --zone=myprivate --set-target=DROP
root@node0X:$ firewall-cmd --permanent --zone=public --add-masquerade
# instead of having to specify a rich rule you can add it as a prefix to the zone
root@node0X:$ firewall-cmd --zone=myprivate --add-source=10.0.0.0/8 --permanent
root@node0X:$ firewall-cmd --reload
root@node0X:$ echo "net.ipv4.ip_forward = 1" | tee /etc/sysctl.d/99-ipforward.conf
root@node0X:$ sysctl --system
root@node0X:$ sysctl net.ipv4.ip_forward
Allow the nodes to reach eachother’s etcd service
1
root@node0X:$ firewall-cmd --zone=myprivate --add-port=2379-2380/tcp --permanent && firewall-cmd --reload
Allow the nodes to reach eachother’s kubeapi
1
root@node0X:$ firewall-cmd --zone=myprivate --add-port=6443/tcp --permanent && firewall-cmd --reload
Allow the nodes to reach the kubelet service
1
root@node0X:$ firewall-cmd --zone=myprivate --add-port=10250/tcp --permanent && firewall-cmd --reload
On all nodes allow the flannel traffic on udp 8472
1
root@node0X:$ firewall-cmd --zone=myprivate --add-port=8472/udp --permanent && firewall-cmd --reload
allow kube-controller-manager traffic
1
root@node0X:$ firewall-cmd --zone=myprivate --add-port=10257/tcp --permanent && firewall-cmd --reload
allow kube-scheduler traffic
1
root@node0X:$ firewall-cmd --zone=myprivate --add-port=10259/tcp --permanent && firewall-cmd --reload
On all nodes allow the DNS traffic and DNS metrics
1
2
3
4
root@node0X:$ firewall-cmd --zone=myprivate --add-port=53/udp --permanent
root@node0X:$ firewall-cmd --zone=myprivate --add-port=53/tcp --permanent
root@node0X:$ firewall-cmd --zone=myprivate --add-port=9153/tcp --permanent
root@node0X:$ firewall-cmd --reload
Setup time synchronization
1
2
3
4
5
6
7
8
9
10
11
12
13
14
15
root@node0X:$ timedatectl set-timezone Europe/Berlin
root@node0X:$ timedatectl
root@node0X:$ dnf install -y chrony
root@node0X:$ systemctl enable --now chronyd
root@node0X:$ cat <<EOF >> /etc/chrony.conf
# German NTP servers
server 0.de.pool.ntp.org iburst
server 1.de.pool.ntp.org iburst
server 2.de.pool.ntp.org iburst
server 3.de.pool.ntp.org iburst
EOF
root@node0X:$ systemctl restart chronyd
root@node0X:$ chronyc tracking
root@node0X:$ firewall-cmd --zone=public --add-service=ntp --permanent
root@node0X:$ firewall-cmd --zone=myprivate --add-service=ntp --permanent && firewall-cmd --reload
Install the cluster
Now we’ll proceed with the actual k8s install.
1
root@node01:$ ansible-playbook -i inventory/mycluster/inventory.ini --become --become-user=root cluster.yml -vv
Once that is done you should have the following services installed:
- Core
- kubernetes 1.32.8 which includes the kube-apiserver, the kube-controller-manager and the kube-scheduler. You can verify this by running:
kubectl get pods -n kube-system -o 'custom-columns=NAME:.metadata.name,VERSION:.spec.containers[*].image' | grep -E 'kube-apiserver|kube-controller-manager|kube-scheduler' - kubelet 1.32.8 running as a systemd service. You can verify this by running:
/usr/local/bin/kubelet --version - etcd 3.5.22 running as a systemd service. You can verify this by running:
etcd --version - containerd 2.1.4 running as a systemd service. You can verify this by running:
containerd --version
- kubernetes 1.32.8 which includes the kube-apiserver, the kube-controller-manager and the kube-scheduler. You can verify this by running:
- Network Plugin
- flannel 0.27.3. You can verify this by running:
kubectl -n kube-system get pods -l app=flannel -o jsonpath='{.items[*].spec.containers[*].image}'
- flannel 0.27.3. You can verify this by running:
- Application
You might run into errors during the ansible script. To revert changes run the following:
1
2
3
4
5
6
7
root@node01:$ ansible-playbook -i inventory/mycluster/inventory.ini --become --become-user=root reset.yml -vv
root@node01:$ dnf install -y netstat
root@node01:$ netstat -tulnp
Active Internet connections (only servers)
Proto Recv-Q Send-Q Local Address           Foreign Address         State       PID/Program name
tcp        0      0 0.0.0.0:22              0.0.0.0:*               LISTEN      903/sshd: /usr/sbin
tcp6       0      0 :::22                   :::*                    LISTEN      903/sshd: /usr/sbin
reconfigure the kubeproxy as it doesn’t apply my serviceClusterIPRange and doesn’t start with iptables for some unknown reason
1
2
3
4
5
6
7
8
9
root@jump:$ kubectl -n kube-system edit configmap kube-proxy
    apiVersion: kubeproxy.config.k8s.io/v1alpha1
    kind: KubeProxyConfiguration
    clusterCIDR: 10.233.64.0/18
    mode: "iptables"
    serviceClusterIPRange: 10.233.0.0/18

root@jump:$ kubectl -n kube-system delete pod -l k8s-app=kube-proxy
root@jump:$ kubectl rollout restart daemonset nodelocaldns -n kube-system
On your computer or jump host:
1
2
3
4
5
6
root@jump:$ dnf install zsh fzf net-tools netcat traceroute
root@jump:$ mkdir -p ~/.zsh/completions
root@jump:$ k completion zsh > ~/.zsh/completions/_kubec
root@jump:$ chsh -s /bin/zsh root
root@jump:$ scp hetzner-k8s-node01:/etc/kubernetes/admin.conf ~/.kube/config
root@jump:$ ssh -L 6443:127.0.0.1:6443 hetzner-k8s-node01
1
2
3
4
5
6
7
8
9
10
11
12
13
14
15
16
17
18
19
20
21
22
23
24
25
26
27
28
29
30
31
32
33
34
35
root@jump:$ nano .zshrc
# Enable Zsh completion system
autoload -Uz compinit
compinit

# kubectl completion
source <(kubectl completion zsh)
source <(fzf --zsh)

# If you use alias 'k' for kubectl
alias k=kubectl
compdef __start_kubectl k

export TERM=xterm

# Arrow keys (with modifiers)
bindkey '^[[1;5D' backward-word   # Ctrl+Left
bindkey '^[[1;5C' forward-word    # Ctrl+Right
bindkey '^[[1;5A' up-line-or-history
bindkey '^[[1;5B' down-line-or-history

bindkey '^[[H' beginning-of-line
bindkey '^[[F' end-of-line
bindkey '^[[1~' beginning-of-line
bindkey '^[[4~' end-of-line
bindkey '^[[3~' delete-char

# Where to save history
HISTFILE=~/.zsh_history

# How many commands to keep in memory during a session
HISTSIZE=50000

# How many commands to save on disk
SAVEHIST=50000
copy over the private key to all cluster members so that they can connect to eachother in case you lose access to one of the nodes
create an alias on your machine to bind the port locally over ssh and fork the process in the background
1
2
root@jump:$ nano .bash_profile
alias kubeconnect='ssh -fNT -L 6443:127.0.0.1:6443 hetzner-k8s-node01'
copy the pem key /etc/kubernetes/pki/ca.crt to your computer and install it in your keystore
1
2
3
4
5
6
7
8
9
root@jump:$ scp hetzner-k8s-node01:/etc/kubernetes/pki/ca.crt /etc/pki/ca-trust/source/anchors
root@jump:$ update-ca-trust extract
root@jump:$ openssl verify -CAfile /etc/pki/tls/certs/ca-bundle.crt /etc/pki/ca-trust/source/anchors/ca.crt
/etc/pki/ca-trust/source/anchors/ca.crt: OK
root@jump:$ nano .kube/config
clusters:
- cluster:
    certificate-authority: /etc/pki/ca-trust/source/anchors/ca.crt
(...)
and your cluster should be available on the jumphost
1
2
3
4
5
6
root@jump:$ ssh -L 6443:127.0.0.1:6443 hetzner-k8s-node01
root@jump:$ k get nodes
NAME         STATUS   ROLES           AGE   VERSION
kube-node1   Ready    control-plane   14m   v1.32.8
kube-node2   Ready    control-plane   13m   v1.32.8
kube-node3   Ready    control-plane   13m   v1.32.8
for reasons i can’t explain yet, the coredns running on the cluster does not have the service ip i set on kubespray. If that ever happens to you, you can fix it with this:
1
2
3
4
5
6
7
root@jump:$ k -n kube-system get svc coredns -o yaml > /tmp/kube-dns.yaml
root@jump:$ nano /tmp/kube-dns.yaml
root@jump:$ k -n kube-system delete svc coredns
root@jump:$ k apply -f /tmp/kube-dns.yaml
root@jump:$ k edit daemonset nodelocaldns -n kube-system
root@jump:$ k rollout restart deployment coredns -n kube-system
root@jump:$ k rollout restart daemonset nodelocaldns -n kube-system
for reasons i can’t explain yet, the kubelet running on the cluster does not have the right dns To fix this:
1
2
3
# set the right coredns ip: 10.233.0.10
root@node0X:$ nano /etc/kubernetes/kubelet-config.yaml
root@node0X:$ systemctl restart kubelet
Cluster performance checks
Once a node goes down, the cluster tries to spawn all the things that were running on it on the healthy nodes. If you don’t have machines and storage that are fast enough it can simply crush your kube-api and kill your cluster.
iostat is a useful tool to monitor latency and weed out those potential issues
1
2
3
4
dnf install -y iostat
# monitor I/O statistics every 1 second for a total of 5 reports
iostat -xd nvme0n1 1 5
I’m having w_await’s between 16-30ms in my homelab which is ok for small clusters but will bite me later if i try to scale. On the production setup at hetzner i’m having r_await and w_await between 1-7ms which is excellent.
debug etcd errors
1
2
3
4
5
6
export ETCDCTL_API=3
etcdctl --endpoints=https://10.210.19.11:2379,https://10.210.19.12:2379,https://10.210.19.13:2379 \
  --cacert=/etc/ssl/etcd/ssl/ca.pem \
  --cert=/etc/ssl/etcd/ssl/node-kube-node1.pem \
  --key=/etc/ssl/etcd/ssl/node-kube-node1-key.pem \
  endpoint status --write-out=table
1
2
3
4
5
6
7
+---------------------------+------------------+---------+---------+-----------+------------+-----------+------------+--------------------+--------+
|         ENDPOINT          |        ID        | VERSION | DB SIZE | IS LEADER | IS LEARNER | RAFT TERM | RAFT INDEX | RAFT APPLIED INDEX | ERRORS |
+---------------------------+------------------+---------+---------+-----------+------------+-----------+------------+--------------------+--------+
| https://10.210.19.11:2379 | XXXXXXXXXXXXXXXX |  3.5.22 |   48 MB |      true |      false |         9 |    8202404 |            8202404 |        |
| https://10.210.19.12:2379 | XXXXXXXXXXXXXXXX |  3.5.22 |   51 MB |     false |      false |         9 |    8202404 |            8202404 |        |
| https://10.210.19.13:2379 | XXXXXXXXXXXXXXXX |  3.5.22 |   50 MB |     false |      false |         9 |    8202404 |            8202404 |        |
+---------------------------+------------------+---------+---------+-----------+------------+-----------+------------+--------------------+--------+
query the etcd members list
1
2
3
4
5
6
export ETCDCTL_API=3
etcdctl --endpoints=https://127.0.0.1:2379 \
  --cacert=/etc/ssl/etcd/ssl/ca.pem \
  --cert=/etc/ssl/etcd/ssl/node-kube-node1.pem \
  --key=/etc/ssl/etcd/ssl/node-kube-node1-key.pem \
  member list --write-out=table
fsync: test how fast etcd can write to the WAL log
Even though i’m using nvmes on the hetzner machines they are bound together through a virtual switch (vswitch) which means that they are in the same datacenter but might be located in different aisles or different buildings which would explain the average results i’m getting on the etcdctl check perf test below. When ordering through the server auction you can’t decide where the machines are located but by going through the “deditcated server” you can configure them on the same rack and link them with a L2 switch instead of a virtualized one.
1
2
3
4
5
6
7
8
9
10
export ETCDCTL_API=3
etcdctl --endpoints=https://127.0.0.1:2379 \
  --cacert=/etc/ssl/etcd/ssl/ca.pem \
  --cert=/etc/ssl/etcd/ssl/node-kube-node1.pem \
  --key=/etc/ssl/etcd/ssl/node-kube-node1-key.pem \
  check perf
PASS: Throughput is 151 writes/s
PASS: Slowest request took 0.072748s
PASS: Stddev is 0.004139s
PASS
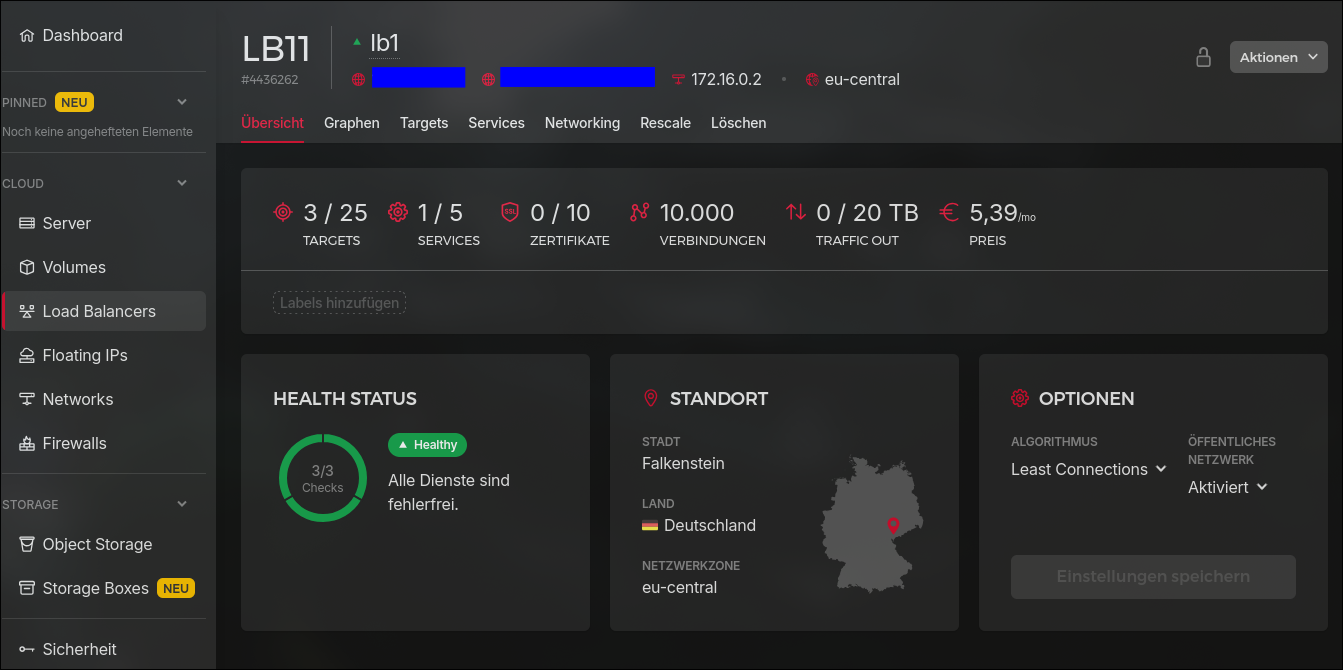
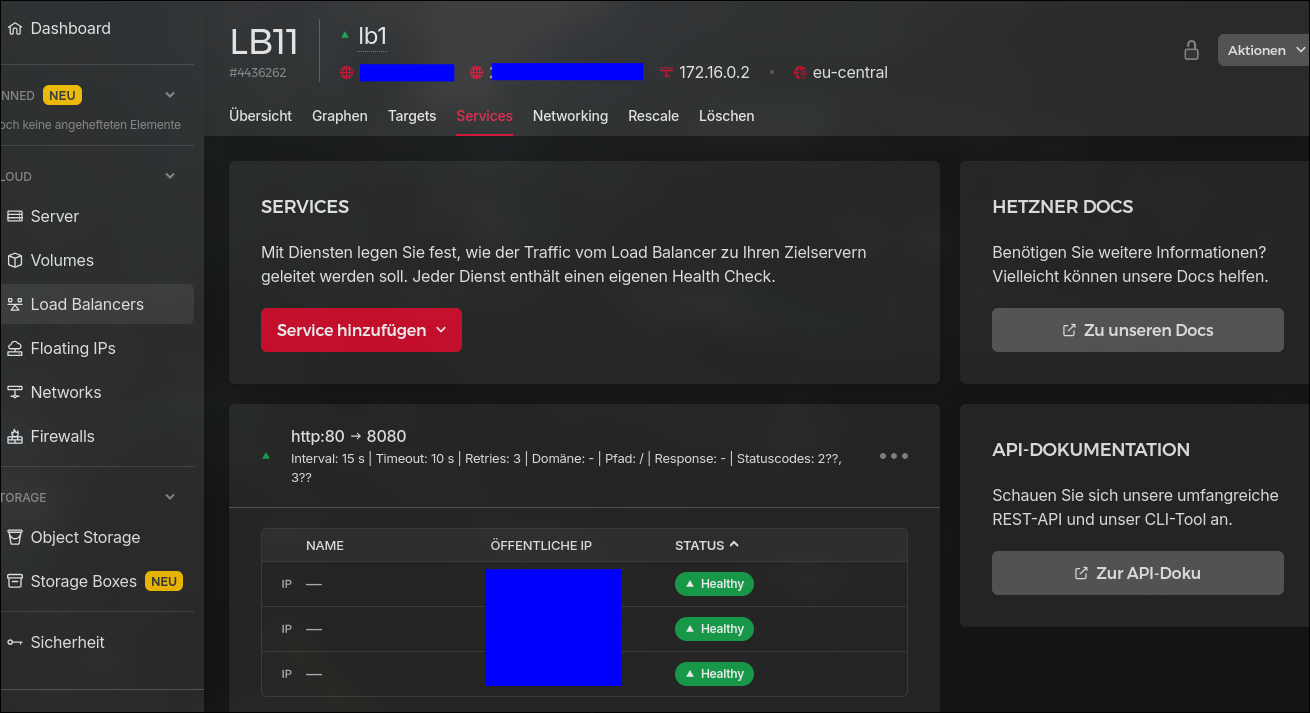
Load balancing
By combining the setup described here with the knowledge from our previous article you can easily set up a load balancer on hetzner that would manage the TLS certificates for you and balance the load between the 3 machines.
Conclusion
Now that the installation is done we can move to the next task which is to configure the storage, backups and monitoring.
Cheers