
Introduction
This article won’t be as technical as other ones in here but I figured it would be interesting regardless. Prices have in general shot up in the last couple of years here in europe so it would make sense to have a system that regulates your thermostats or your lights on a schedule. There are multiple avenues to explore in this space like automatically turning your lights on and off based on motion sensors and how bright it is in the room but I would say the gateway drug that introduced me to this space was my gas bill. I’m the kind of person who often forgets the heating on the whole day so having a dashboard I could use to control all of those was a blessing for me.
Topology
So what do we need to setup in order for this to work? Let’s go through the devices and software:
- An image of frigate, home assistant and NPM nginx proxy manager usually available on dockerhub if you haven’t exhausted your daily limit ^^ NPM is in our setup a reverse proxy that adds the TLS/SSL certificates to the http connections and frigate acts as our camera controller. I opted for frigate because it has some interesting AI built in and because home assistant has a middleware that would allow us to plug and play our camera feed as opposed to writing and maintaining our own.
- An OS that is compatible with docker i.e. no FreeBSD or any 32 bit CPU architecture. You could of course build the sources yourself but I just don’t think it’s worth our time
- You’ll need it to run 24/7 so a small form factor PC or SBC single board computer like a raspberry pi 3 will do just fine.
- A zigbee dongle like this one from Sonoff: Sonoff Zigbee Gateway EFR32MG21
- Zigbee Motion sensors: Aqara RTCGQ11LM
- Zigbee thermostats like this one: Sonoff TRVZB Zigbee Smart thermostat
- Zigbee light switches like this one: Sonoff ZBMINIL2 Zigbee Smart switch
- Zigbee thermometers like this one: Sonoff SNZB-02D Zigbee thermometer
- A wifi camera that you have lying around preferably one that has the ability to stream it’s feed in the RTSP protocol. If you’re unlucky enough to have gotten one of those reolink wifi cameras I’m sorry to tell you that they won’t do RTSP despite saying so on the packaging. No PoE and no RTSP is a shame for such an expensive piece of tech that works exclusively with its own app on the appstore/google store. This means that, in practice, if you want to check the feed on your camera you have to open a connection to a datacenter in China. If you are one of the unlucky ones like me don’t despair. There is an alternative on github open sourced for free by thirtythreeforty. This bridge acts like a proxy that tranforms the camera’s feed into an RTSP stream that you can connect to your camera controller which is in our case frigate
I’ve opted for zigbee over wifi because I want my devices to be running whether there is wifi or not. Another reason to get them is their lower power consumption and the mesh properties of a zigbee network. Any zigbee device funtions as a relay as well which automagically strenghtens the signal. Another adavantage of using zigbee is I’m not polluting my wifi with iot devices which would probably degrade the experience of users on the wifi network.
Configuring home assistant

Home assistant’s configuration is a simple drag and drop GUI available over HTML5 running on a docker container. Sensors and thermometers send over data over the zigbee protocol to the dongle (/dev/ttyACM0) which I then pass through to the docker container. I’ve added the raspberry pi into it’s own VLAN because this device does not need access to any internal device except for the the wifi camera’s RTSP bridge and sometimes with the internet to gather weather information. Another advantage of using a VLAN is that I can easily add another raspberry pi to my network, plug it into any other switch and have both devices discover each other without any problem.
1
2
3
4
5
6
7
8
9
10
11
12
13
14
15
16
17
18
19
20
21
22
23
24
25
26
27
28
29
30
31
32
33
34
35
36
37
38
39
40
41
42
43
44
45
46
47
48
49
50
51
52
53
root@raspberrypi:$ mkdir config
root@raspberrypi:$ nano config/configuration.yaml


# Loads default set of integrations. Do not remove.
homeassistant:
  name: Home
  latitude: 30.000001
  longitude: 120.256841
  elevation: 430
  unit_system: metric
  currency: EUR
  country: DE
  time_zone: "Europe/Berlin"
  external_url: "https://homeassistant.local"
  internal_url: "http://localhost:8123"
  legacy_templates: false

auth_oidc:
    client_id: "yourClientID"
    client_secret: "yourClientSecret"
    discovery_url: "https://oidcprovider/discover-endpoint"

http:
  ip_ban_enabled: true
  login_attempts_threshold: 6
  use_x_forwarded_for: true
  trusted_proxies:
    - 10.10.85.101
# Load frontend themes from the themes folder
frontend:
  themes: !include_dir_merge_named themes

# Example configuration.yaml entry
notify:
  - name: "Notification"
    platform: smtp
    sender: "sender@mail.de"
    recipient: "recipient@mail.de"
    server: "email.outlook.de"
    port: your_email_port
    timeout: 15
    encryption: starttls
    username: "notification@thekor.eu"
    password: "supersecretpassword"
    sender_name: "Home assistant"


automation: !include automations.yaml
script: !include scripts.yaml
scene: !include scenes.yaml

history:
And start your container
1
root@raspberrypi:$ docker run -d -p 0.0.0.0:8123:8123 --name homeassistant --privileged --restart=unless-stopped -e TZ=Europe/Berlin -v /dev/ttyACM0:/dev/ttyACM0 -v ./config:/config  ghcr.io/home-assistant/home-assistant:latest
The -d runs the docker process as a daemon on the background, the -p 0.0.0.0:8123:8123 option allows any ipv4 address to bind to our service, the --restart=unless-stopped option is very useful in case of a reboot or a restart of the docker service as it automatically brings up the container in case one of these two events occur.
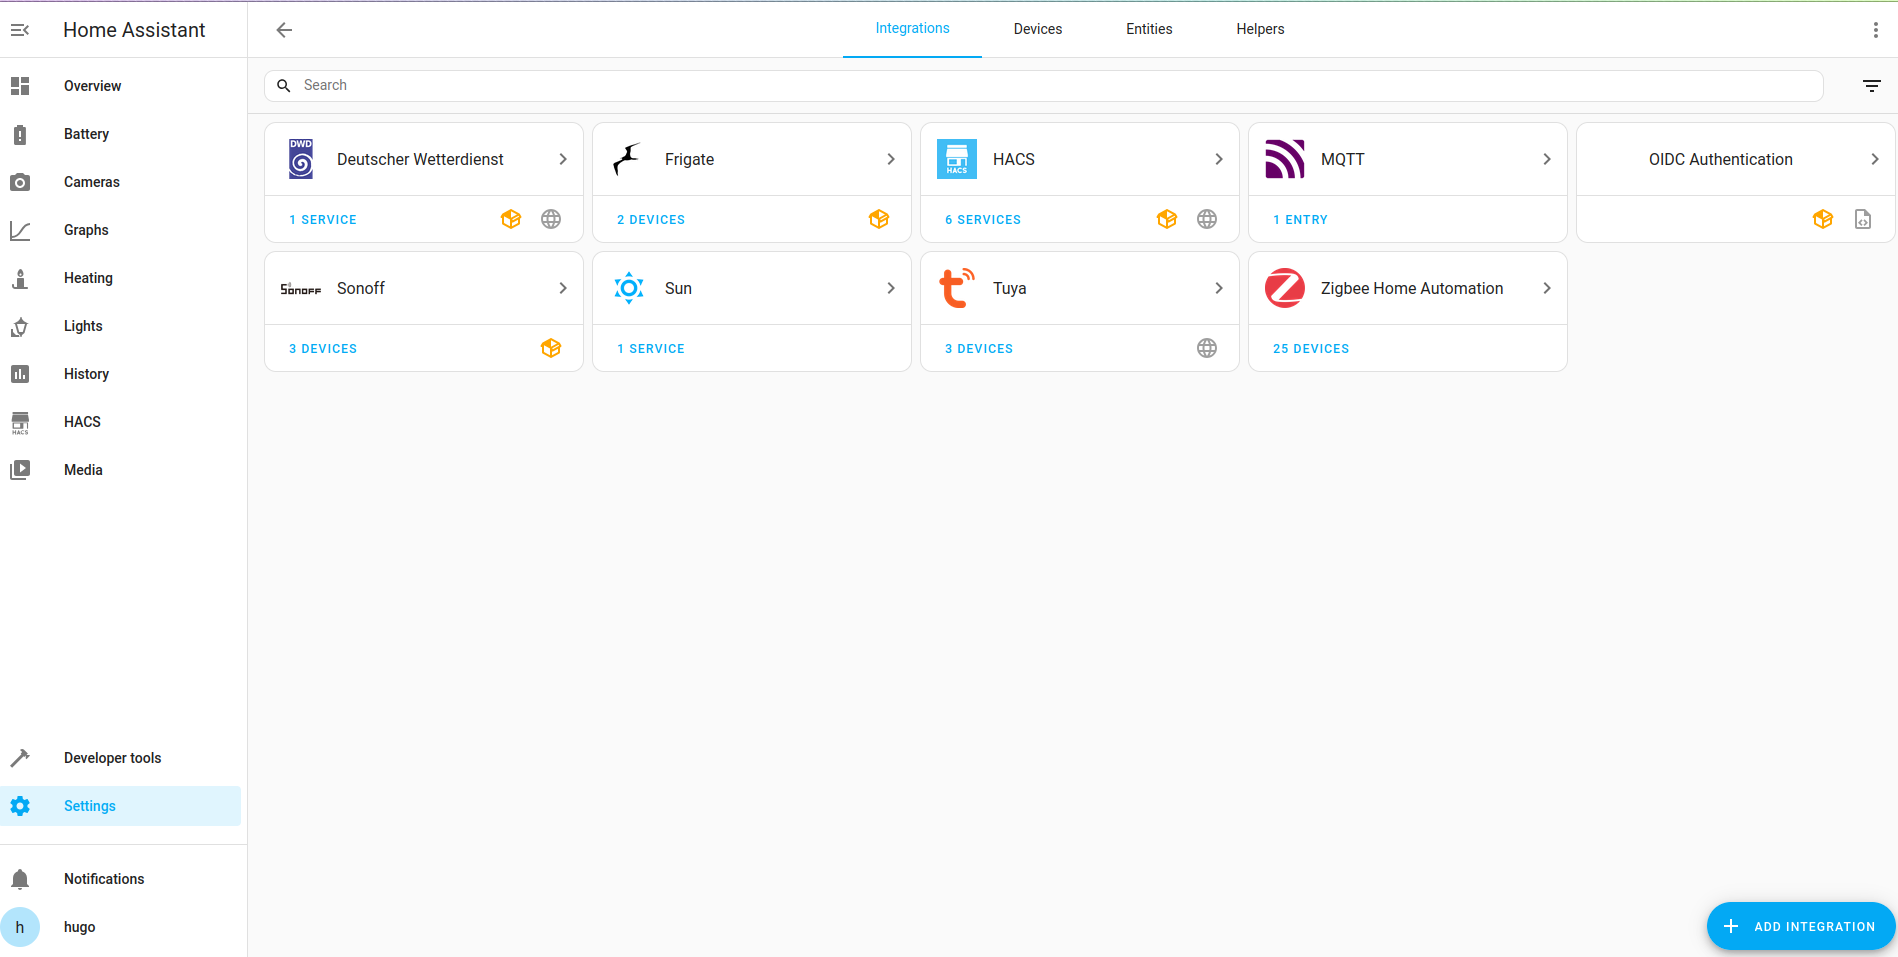
Once you login to the GUI you can start adding your devices to home assistant you’ll probably need a couple of additional packages. Below are the packages I use and recommend. You can skip the HACS store altogether if you want to do everything from the command line. The MQTT and frigate packages can be ignored in case you have no cameras in your setup. Also the open ID connect is useful for single sign on but is not mandatory of course. The Tuya is not needed if you don’t have these wifi light bulbs that change color.
Once that’s done you can start adding some automations based on schedules or luminosity and then add dashboards with the things you would like to follow up on. In my case these are:
-
The sensor’s battery power grouped by room
![home-lab]()
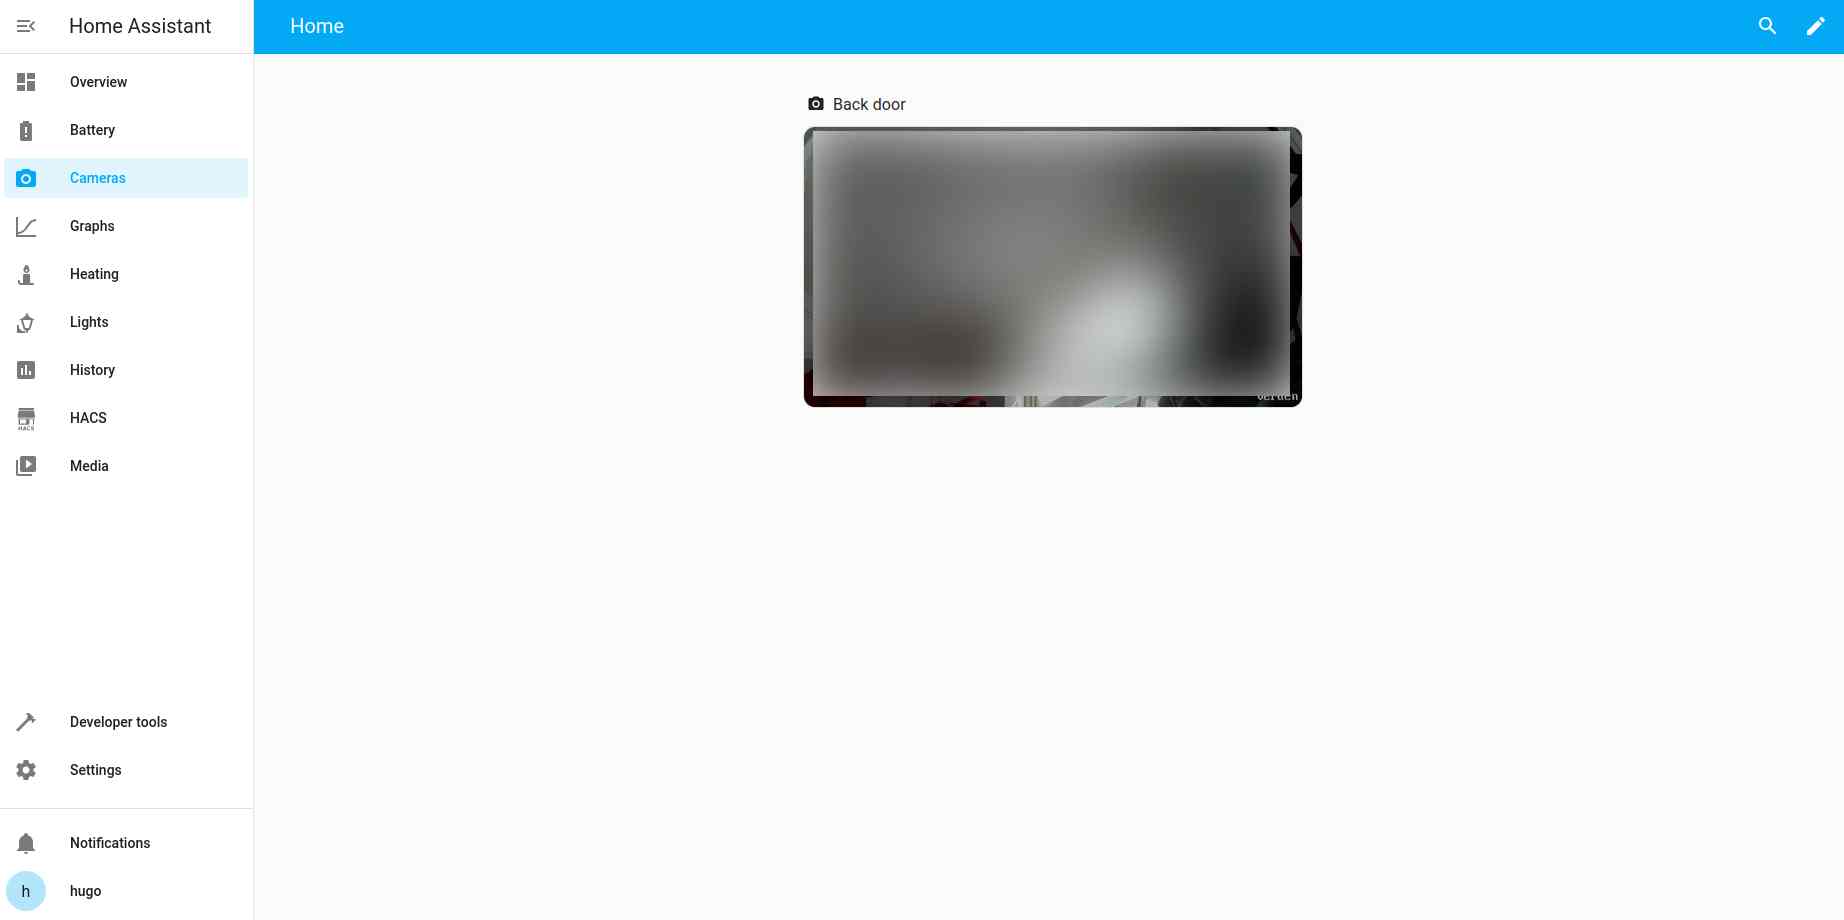
-
Frigate’s RTSP camera stream
![home-lab]()
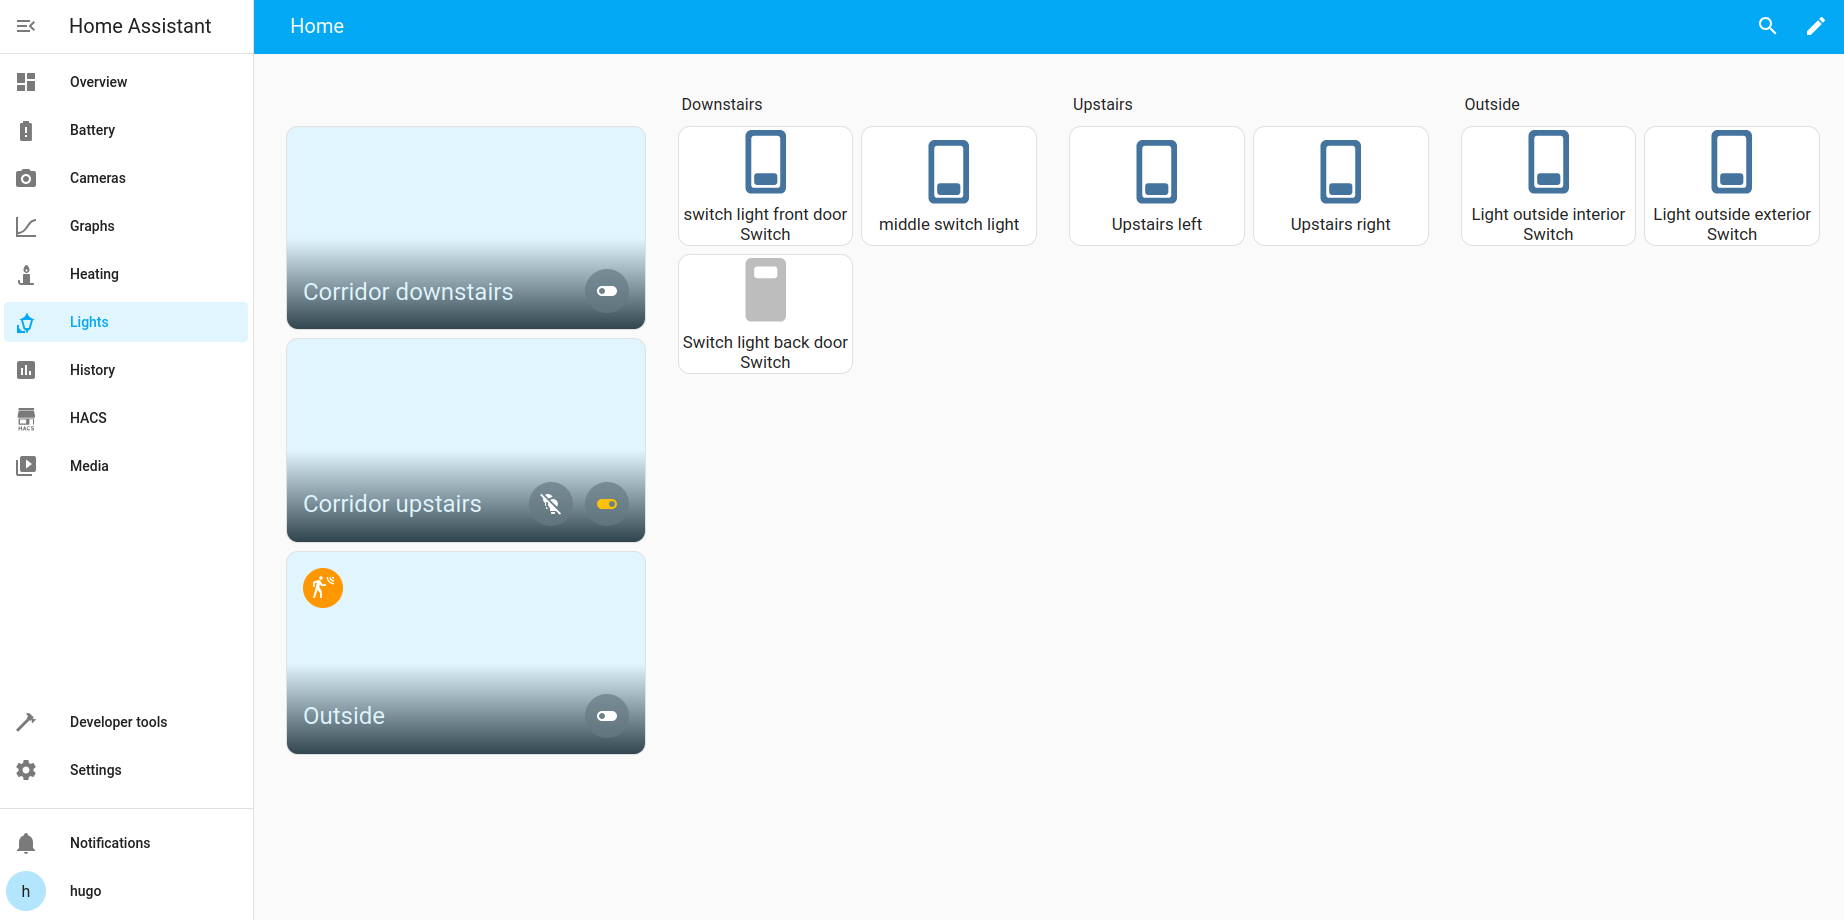
-
The light switches
![home-lab]()
-
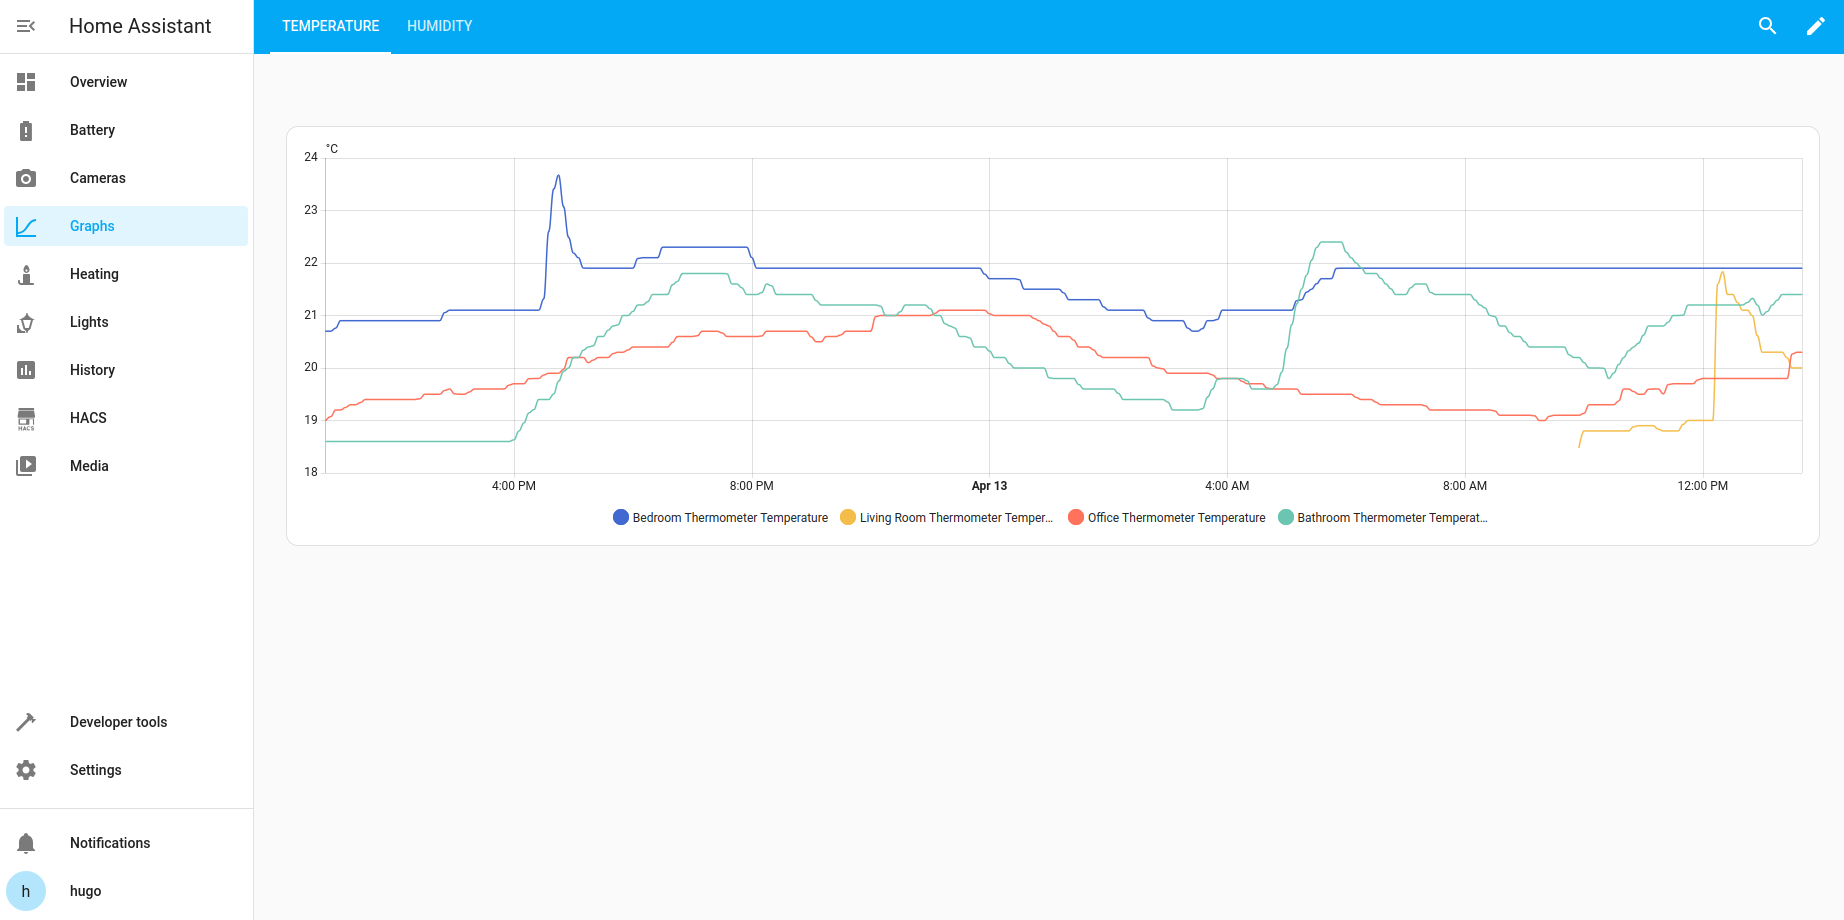
Temperature and humidity graphs
![home-lab]()
-
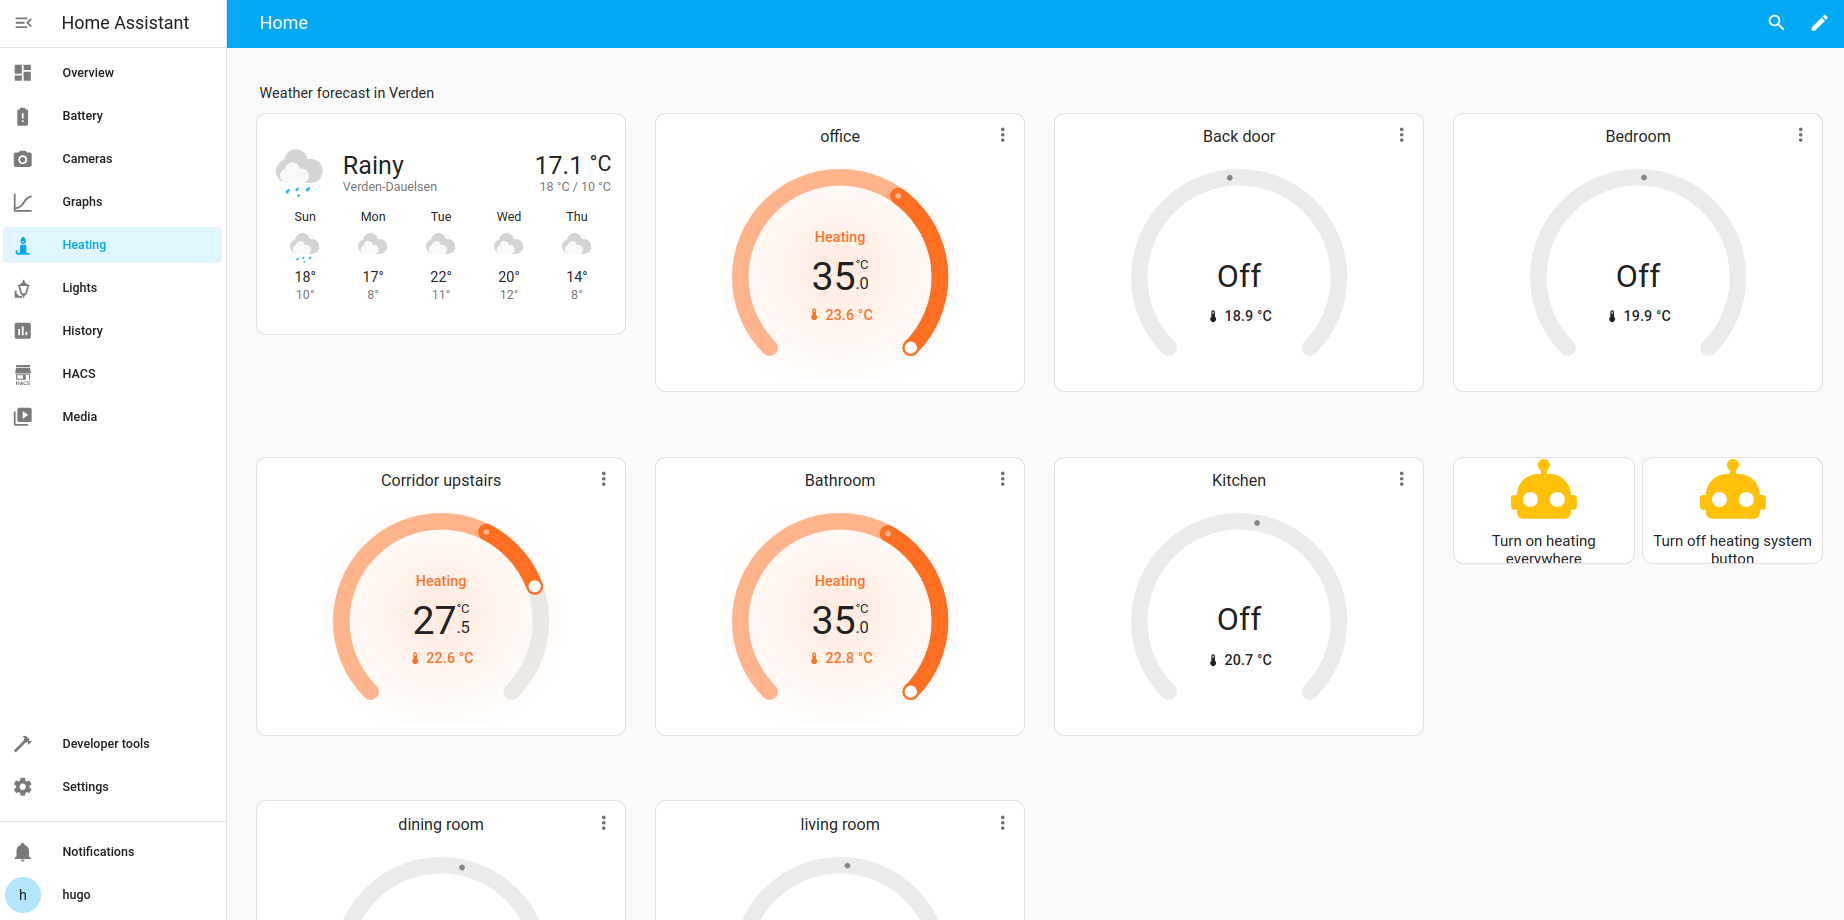
The wheather forecast for your city and thermostat controllers with some additional buttons to make life easier
![home-lab]()
-
The light bulb color controller
![home-lab]()


Living in Germany you probably noticed the adoration people have for this thing called “Lüften” which is a science of its own. If you didn’t then safely ignore it. “Lüften” involves renewing the air in a room which is believed to become toxic if no windows are opened during the day. Or so the tale goes. While I don’t adhere to it I agree that one needs to open its windows once in a while to avoid mold formation and to bring in fresh oxygen and avoid dizziness when working long hours.
I’ll probably add a graph at some point that helps me judge when to open windows which is called the confort index and should be a function of temperature and humidity. This index is generally present on most digital thermometers these days as either a smiley face or a scale that tells you if the air is too dry or too wet

Configuring frigate
Configure frigate to record the last 3 days
1
2
3
4
5
6
7
8
9
10
11
12
13
14
15
16
17
18
19
20
21
22
23
24
25
26
27
28
29
30
31
32
root@frigate:$ mkdir config
root@frigate:$ nano config/config.yml


mqtt:
  host: 10.10.85.100
  user: mq
  password: secretpw

cameras:
  reolink:
    ffmpeg:
      inputs:
        - path: rtsp://<ip>:<rtsp-port>/verden/
          roles:
            - detect
            - rtmp
    detect:
      height: 1080
      width: 1920
      fps: 5

record:
  enabled: true
  retain:
    days: 3
    mode: all
  events:
    retain:
      default: 10
      mode: motion
version: 0.14
And create the docker compose file for our camera controller
1
2
3
4
5
6
7
8
9
10
11
12
13
14
15
16
17
18
19
20
21
22
23
24
25
root@frigate:$ touch .env
root@frigate:$ nano docker-compose.yml

services:
  frigate:
    container_name: frigate
    privileged: true
    restart: unless-stopped
    image: ghcr.io/blakeblackshear/frigate:stable
    shm_size: "64mb"
    volumes:
      - /etc/localtime:/etc/localtime:ro
      - ./config:/config
      - ./storage:/media/frigate
      - type: tmpfs # Optional: 1GB of memory, reduces SSD/SD Card wear
        target: /tmp/cache
        tmpfs:
          size: 1000000000
    ports:
      - "5000:5000"
      - "9054:8554" # RTSP feeds
      - "8555:8555/tcp" # WebRTC over tcp
      - "8555:8555/udp" # WebRTC over udp
    environment:
      FRIGATE_RTSP_PASSWORD: ${FRIGATE_RTSP_PASSWORD}
Once the proper firewall rules are in place and frigate is running you can provision an account, add the custom integration to home assistant and go through the wizard. Home assistant just needs frigate’s ip address and the port 5000
Thank you for reading and see you on the next one